I have a tradition each Christmas of building a toy for my kids. The Latch House last year was a lot of fun, and this year I decided I wanted to work on a bath toy before the kids started to lose that playful joy of bathtime.
Ideation
I like to use the whiteboard to capture numerous concepts at the beginning of the project. This usually begins with a list (quantity over quality), and then some rough sketches. Some initial ideas centered around building a “WaterWorks” water wall for the bath, in which water falls through a customizable course of tubes and paths (similar to a marble run).
I was intrigued by the idea of having the outflow of water not just fall back into the tub but propel water toys floating in the tub. Iterating by refocusing on that led to several fun concepts–including a wooden submarine.
Ideas I liked best at this stage were:
- Ability to connect up to four vessels to the shower line
- Partial submersion of the sub by an embedded weight
- Aside from movement from the water flow, having elements of interaction such as bubbles, spraying and underwater electronics (e.g. light)
- Ultimately, a submarine made out of wood–I’ve never heard of such a thing. Googling it didn’t bring up much, so it felt pretty novel.
The Problem of Power
If the sub was going to move around, there were several options for power: hand or electric pumps, lifting up a filled reservoir, battery-powered propellers, pneumatics, hydraulics, etc. The most obvious and most powerful option, though, was to use the flow of water right from the faucet or shower line.
The Problem of Submersion
Unlike a boat, a submarine cannot just float on top of the water. If it were made of wood, I would need to embed a material much denser than water inside. Aside from submersion, there was also the problem of proper balance–the sub should not point upwards/downwards or tilt to the side. There are mathematical ways of figuring out exactly how much and where the weight needed to be, but nothing about my project was to be that precise, so I opted to iteratively test and refine the prototype until it was the product. Assuming I would use redwood for this project [0.02 lbs/in³], I investigated a number of materials that were denser than water [0.04 lbs/in³]:
- Lead Weights: Heavy, but too dangerous a material [0.41 lbs/in³]
- Steel Metal Shavings: Heavy and shiftable, but dangerous if it ever leaked [0.28 lbs/in³]
- Osmium: densest naturally occurring element, but too expensive [0.81 lbs/in³]
- Sand: Shiftable, but by my rough calculations not heavy enough [0.06 lbs/in³]
- Aluminum: Affordable, but not heavy enough [0.10 lbs/in³]
- Copper: Less affordable, but heavier than steel [0.32 lbs/in³]
I ended up choosing a long metal rod (3/4 in), threaded so I could adjust exact placement. Later in testing, I found out that was not nearly heavy enough, and so I cleared out much of the underbelly of the sub and filled it with copper-covered steel ball bearings. By testing and adjusting the amount, I was able to achieve the desired amount of submersion and balance.


Design Constraints
Aside from the goal of creating a bath toy that would delight my kids, there were a number of other design constraints I wanted for this project:
Form
- Artifacts should be hidden (e.g. no visible screw heads, seams or part-lines)
- Made of wood with contrast between primary and secondary elements
Function & Fun
- Must float partially submerged but not sink
- Must float level (i.e. not pointing up/down or rolling to the side)
- Must allow for adjustment (e.g. to make level and submersible, to change batteries, etc.)
- Must allow for continuous flow (e.g. connected to water source)
- Must have a wow-factor interaction (e.g. the light)
Safety
- Cannot use dangerous materials for kids (e.g. lead)
- No small parts or small magnets (e.g. choking)
- No risk of electric shock
- Long tubes/cables must be detachable (e.g. breakaway to prevent strangulation)
Durability
- Must be able to withstand water for extended periods of time
- Must be able to withstand being dropped and played rough with
- Must be easy to clean
Submarine Anatomy
Not knowing much about submarines, I needed to do some research. This diagram from the U.S. Office of Naval Research was my original reference. Knowing the names of the different parts of a submarine will (hopefully) help you make sense of the rest of this story.

Building the Submarine
Wood Selection
I had a preference of using redwood for this project, largely for its carveability, strong figure and chemical durability. I spent at least 30 minutes selecting the proper lumber, paying special attention to length of clear wood and the age of the heartwood. I opted for a piece that was mostly heartwood, which would give the sub a mix of dark and light wood.
I also decided it was okay for my son Dylan to see things at this stage–no surprise revealed here.

Shaping
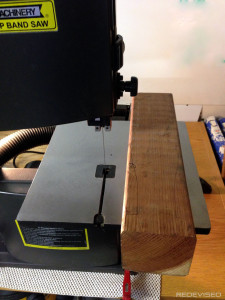
After cutting the wood to a suitable length and marking out a simple outline, I roughly shaped it with the band saw. I didn’t want the sub to be a simple cylinder, so I added a more pronounced conture–which also would make the rear “fins” more prominent. I kept a square end on both ends to simplify future drilling and carving.


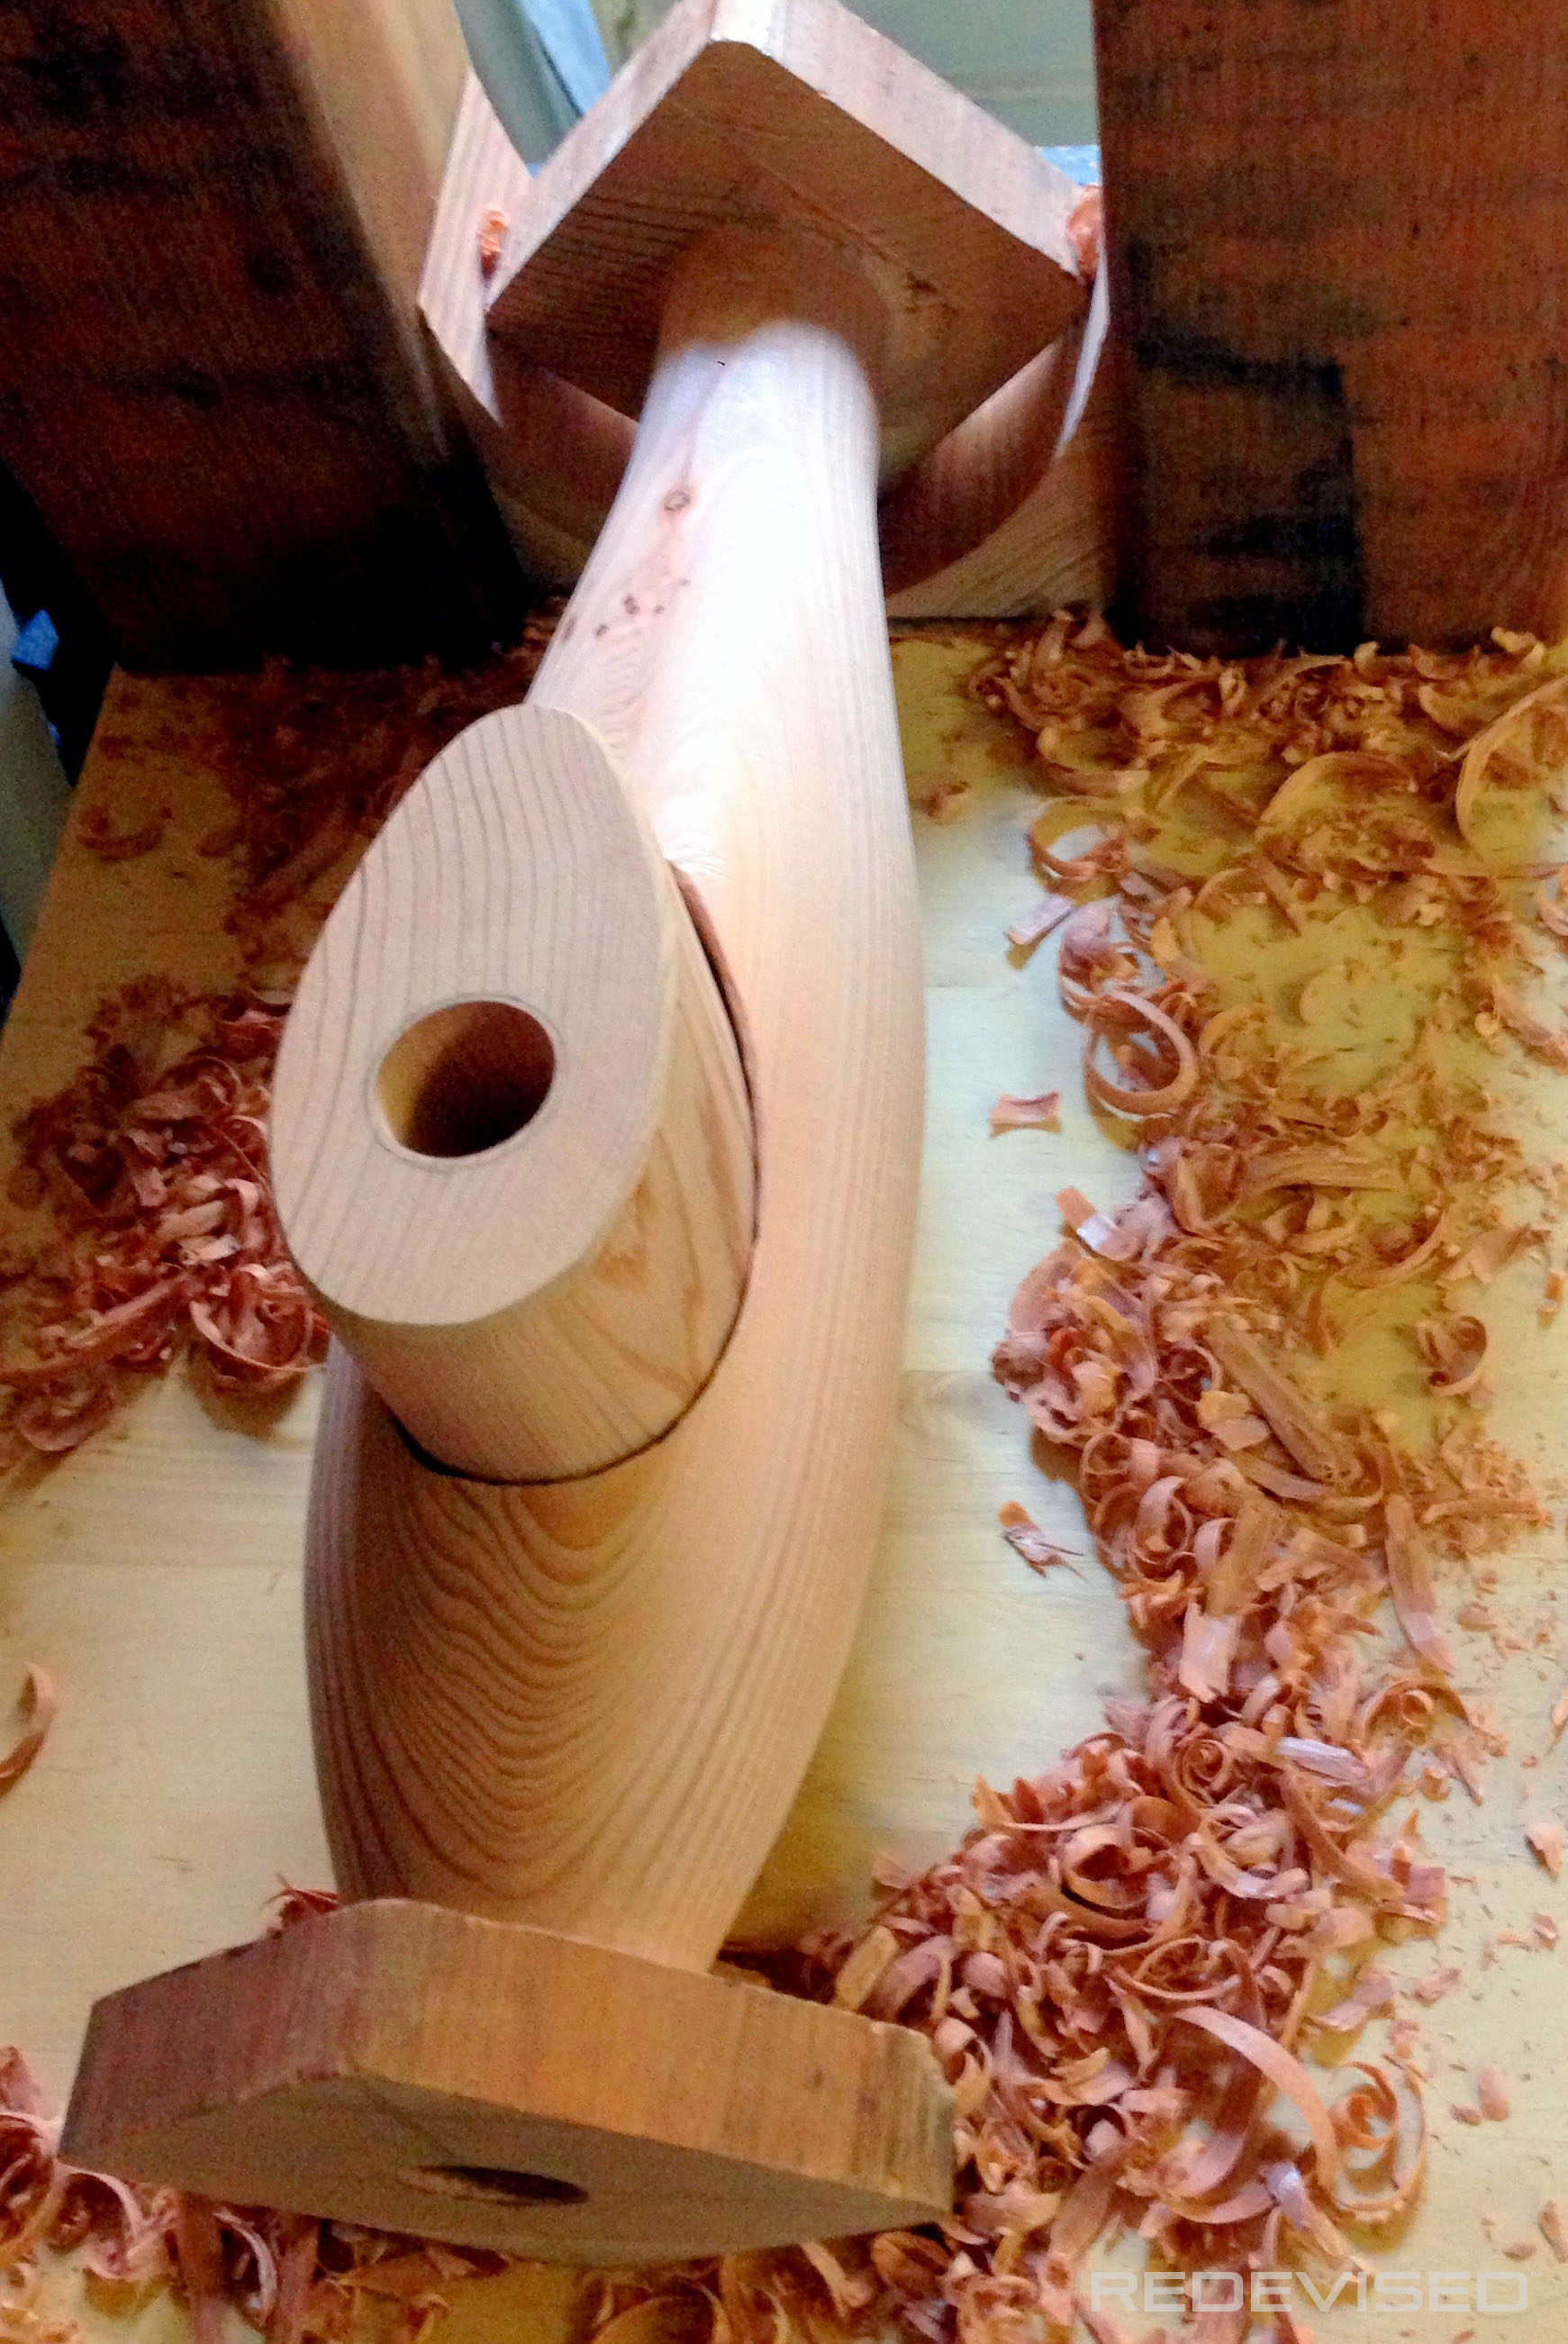
And then rounded it out on the lathe. In the photo below, note the boundary between the darker heartwood and lighter sapwood. The concentric rings seemed almost like lines of water to me, and I decided to have the sapwood face downward as it were water at the bottom.


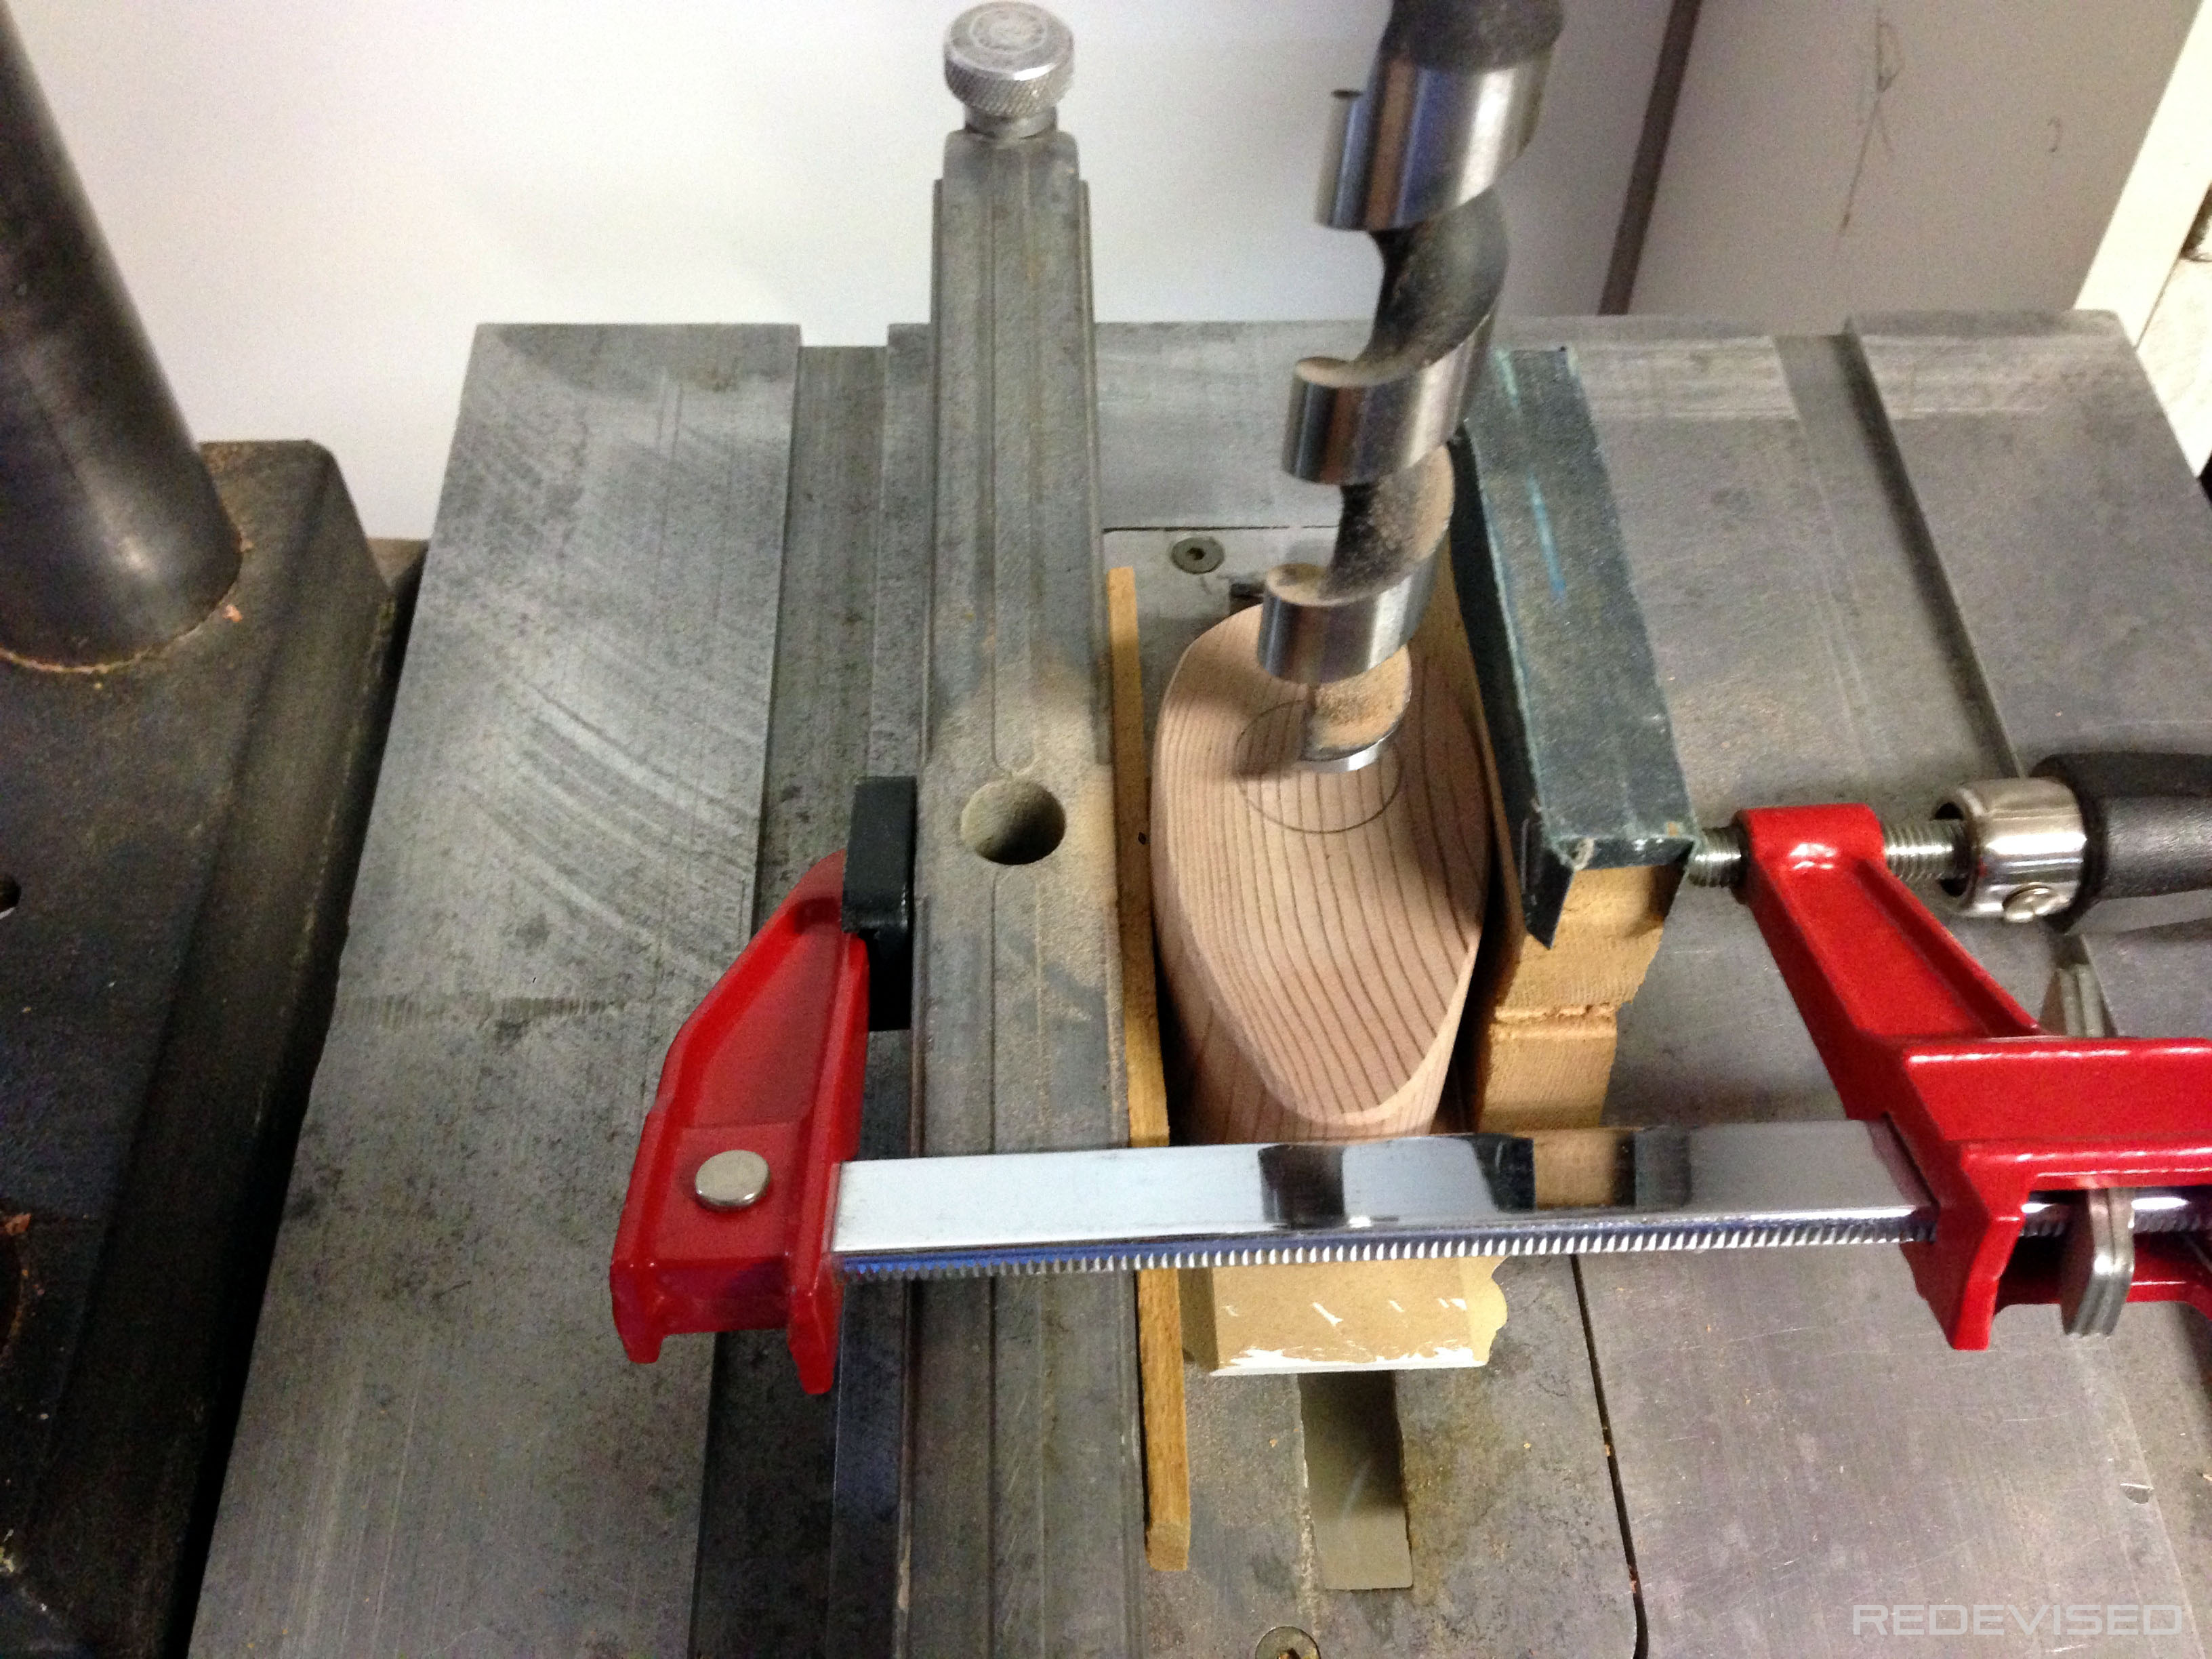
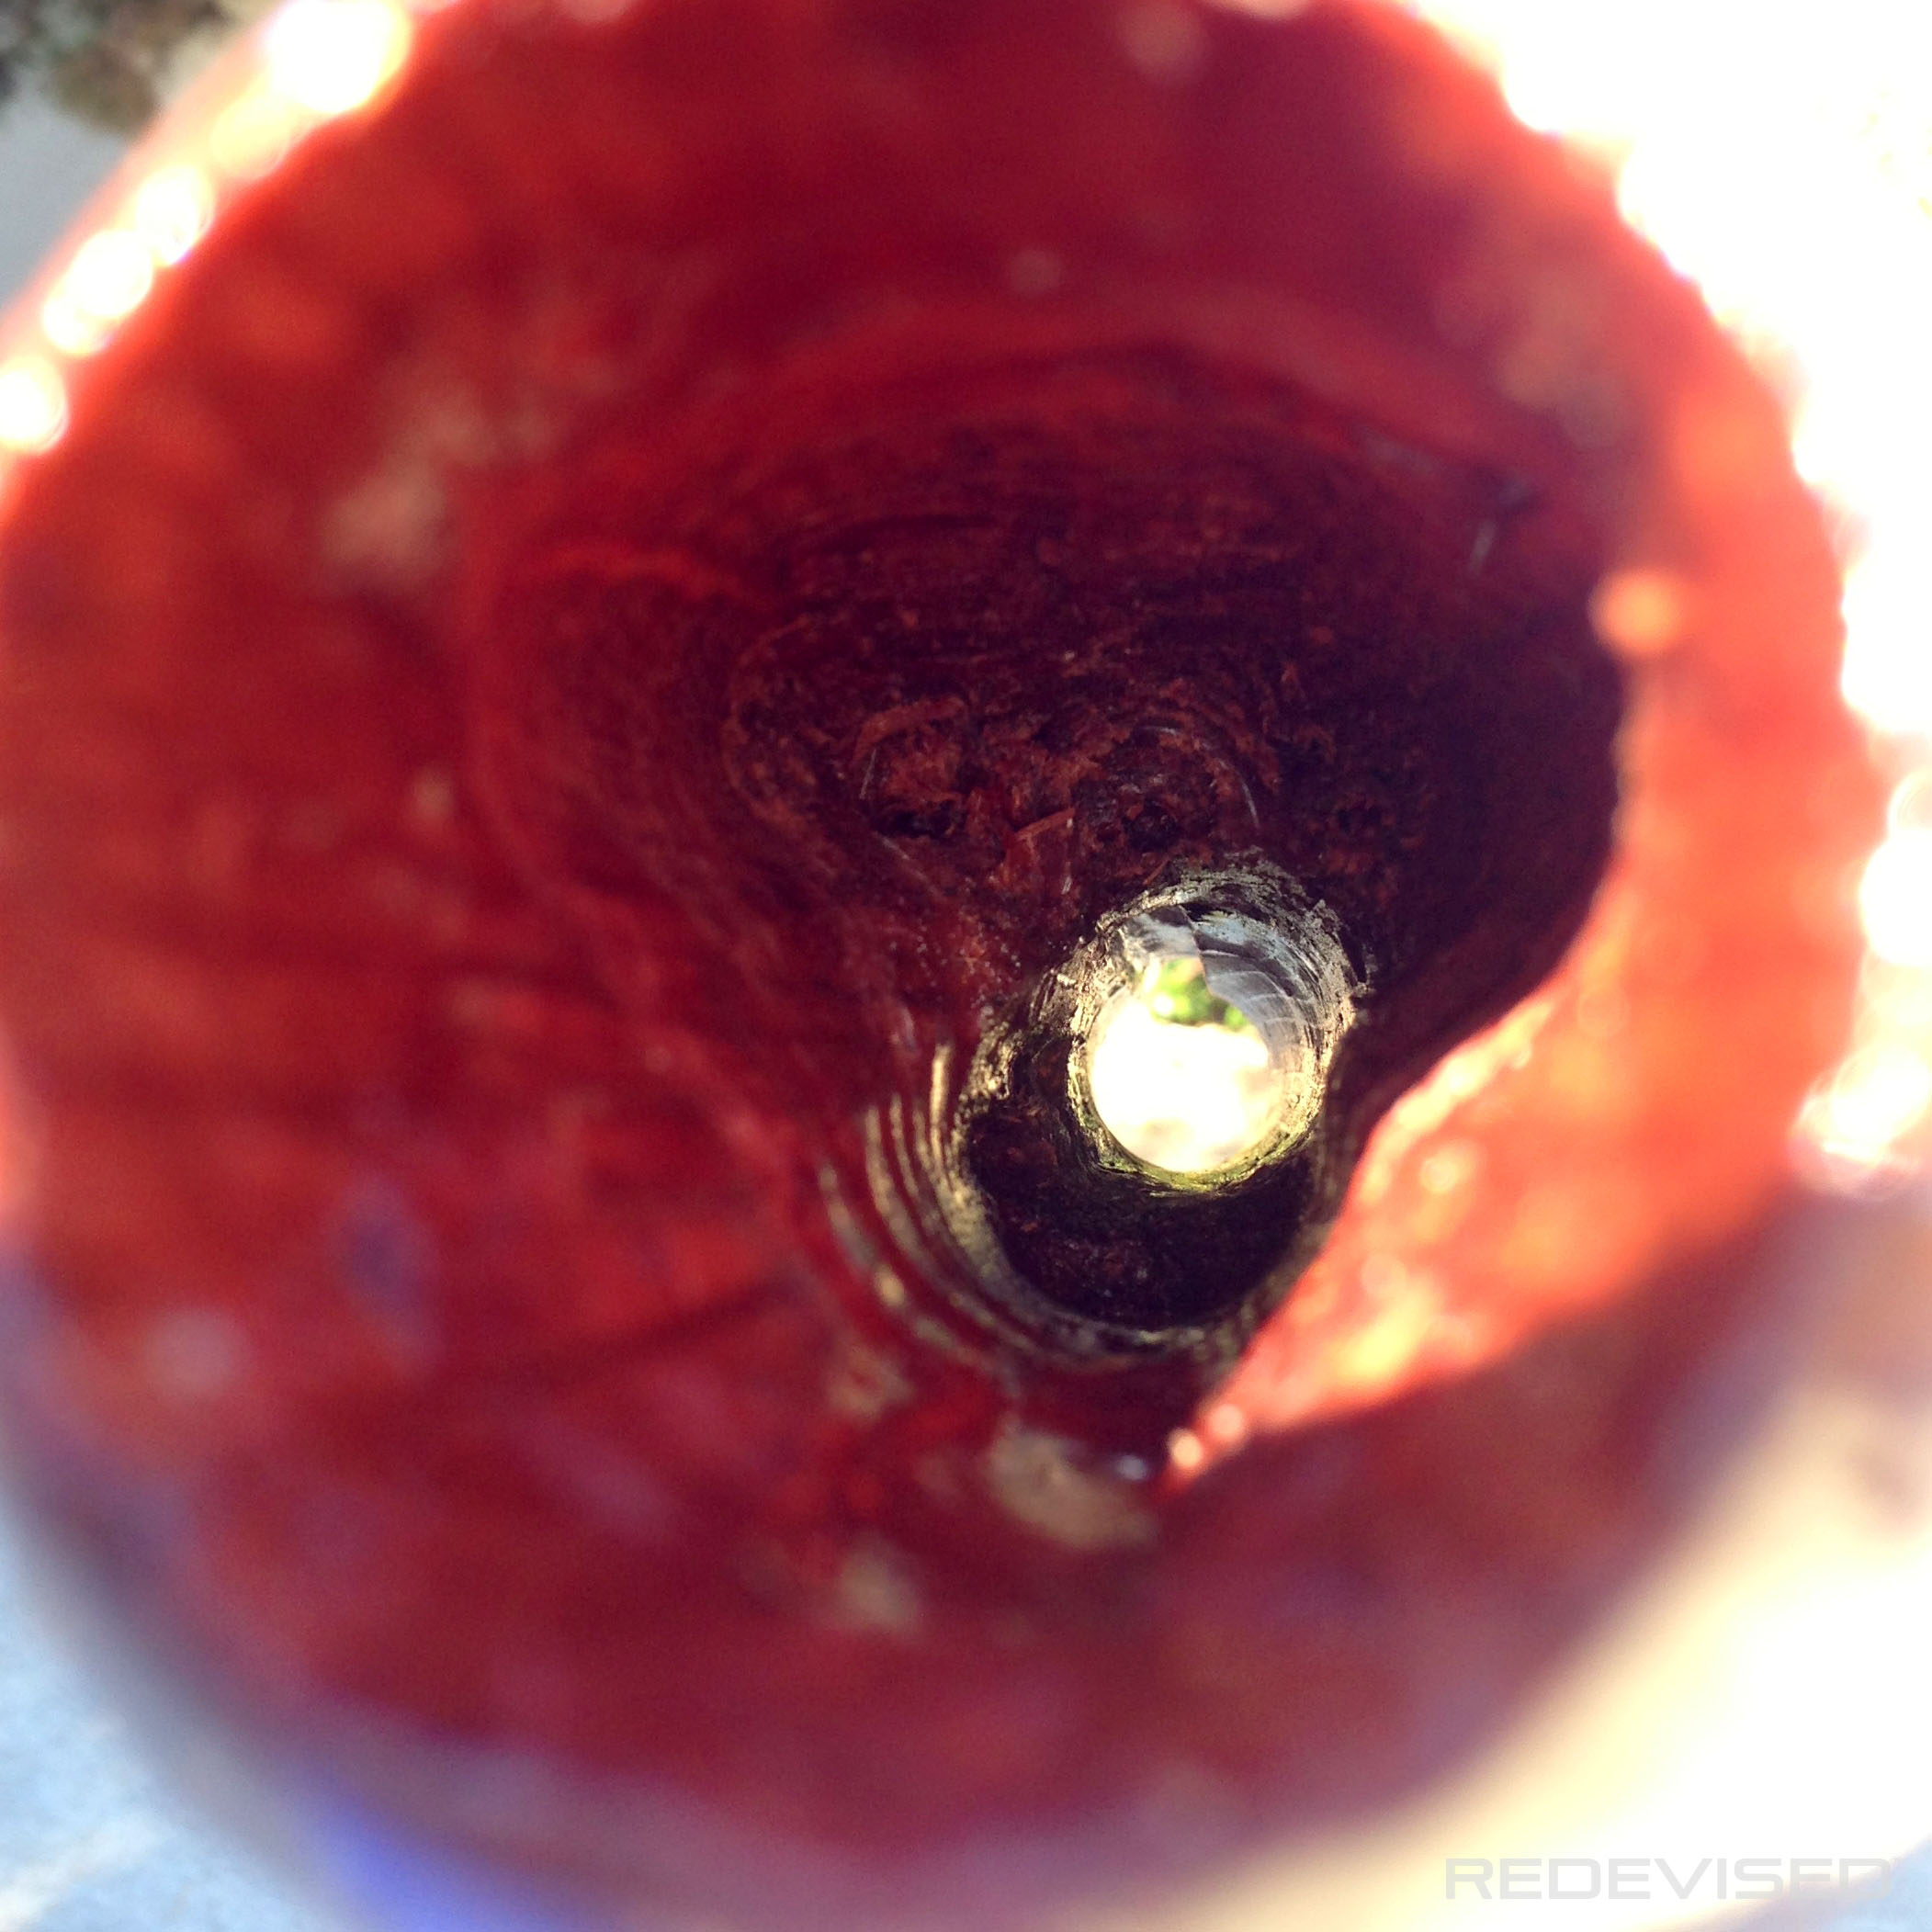
The center of the sub needed to be hollowed out to put the weight inside. To do this I used progressively larger auger bits on the drill press.


The Sail
Next, it was time to work on the sail. Originally I liked the idea of it being tear drop shaped, though later I rounded it out a bit.
The sail would rest slightly under the surface of the sub’s body. This was important so that it would not rotate or show gaps if the fitting wasn’t perfect. Also, since I wanted the rudder to be vertical, I needed to set up a crude jig to hold the sub in place (i.e. so the “fins” would be cross-shaped and not like an X).


The “Periscope”
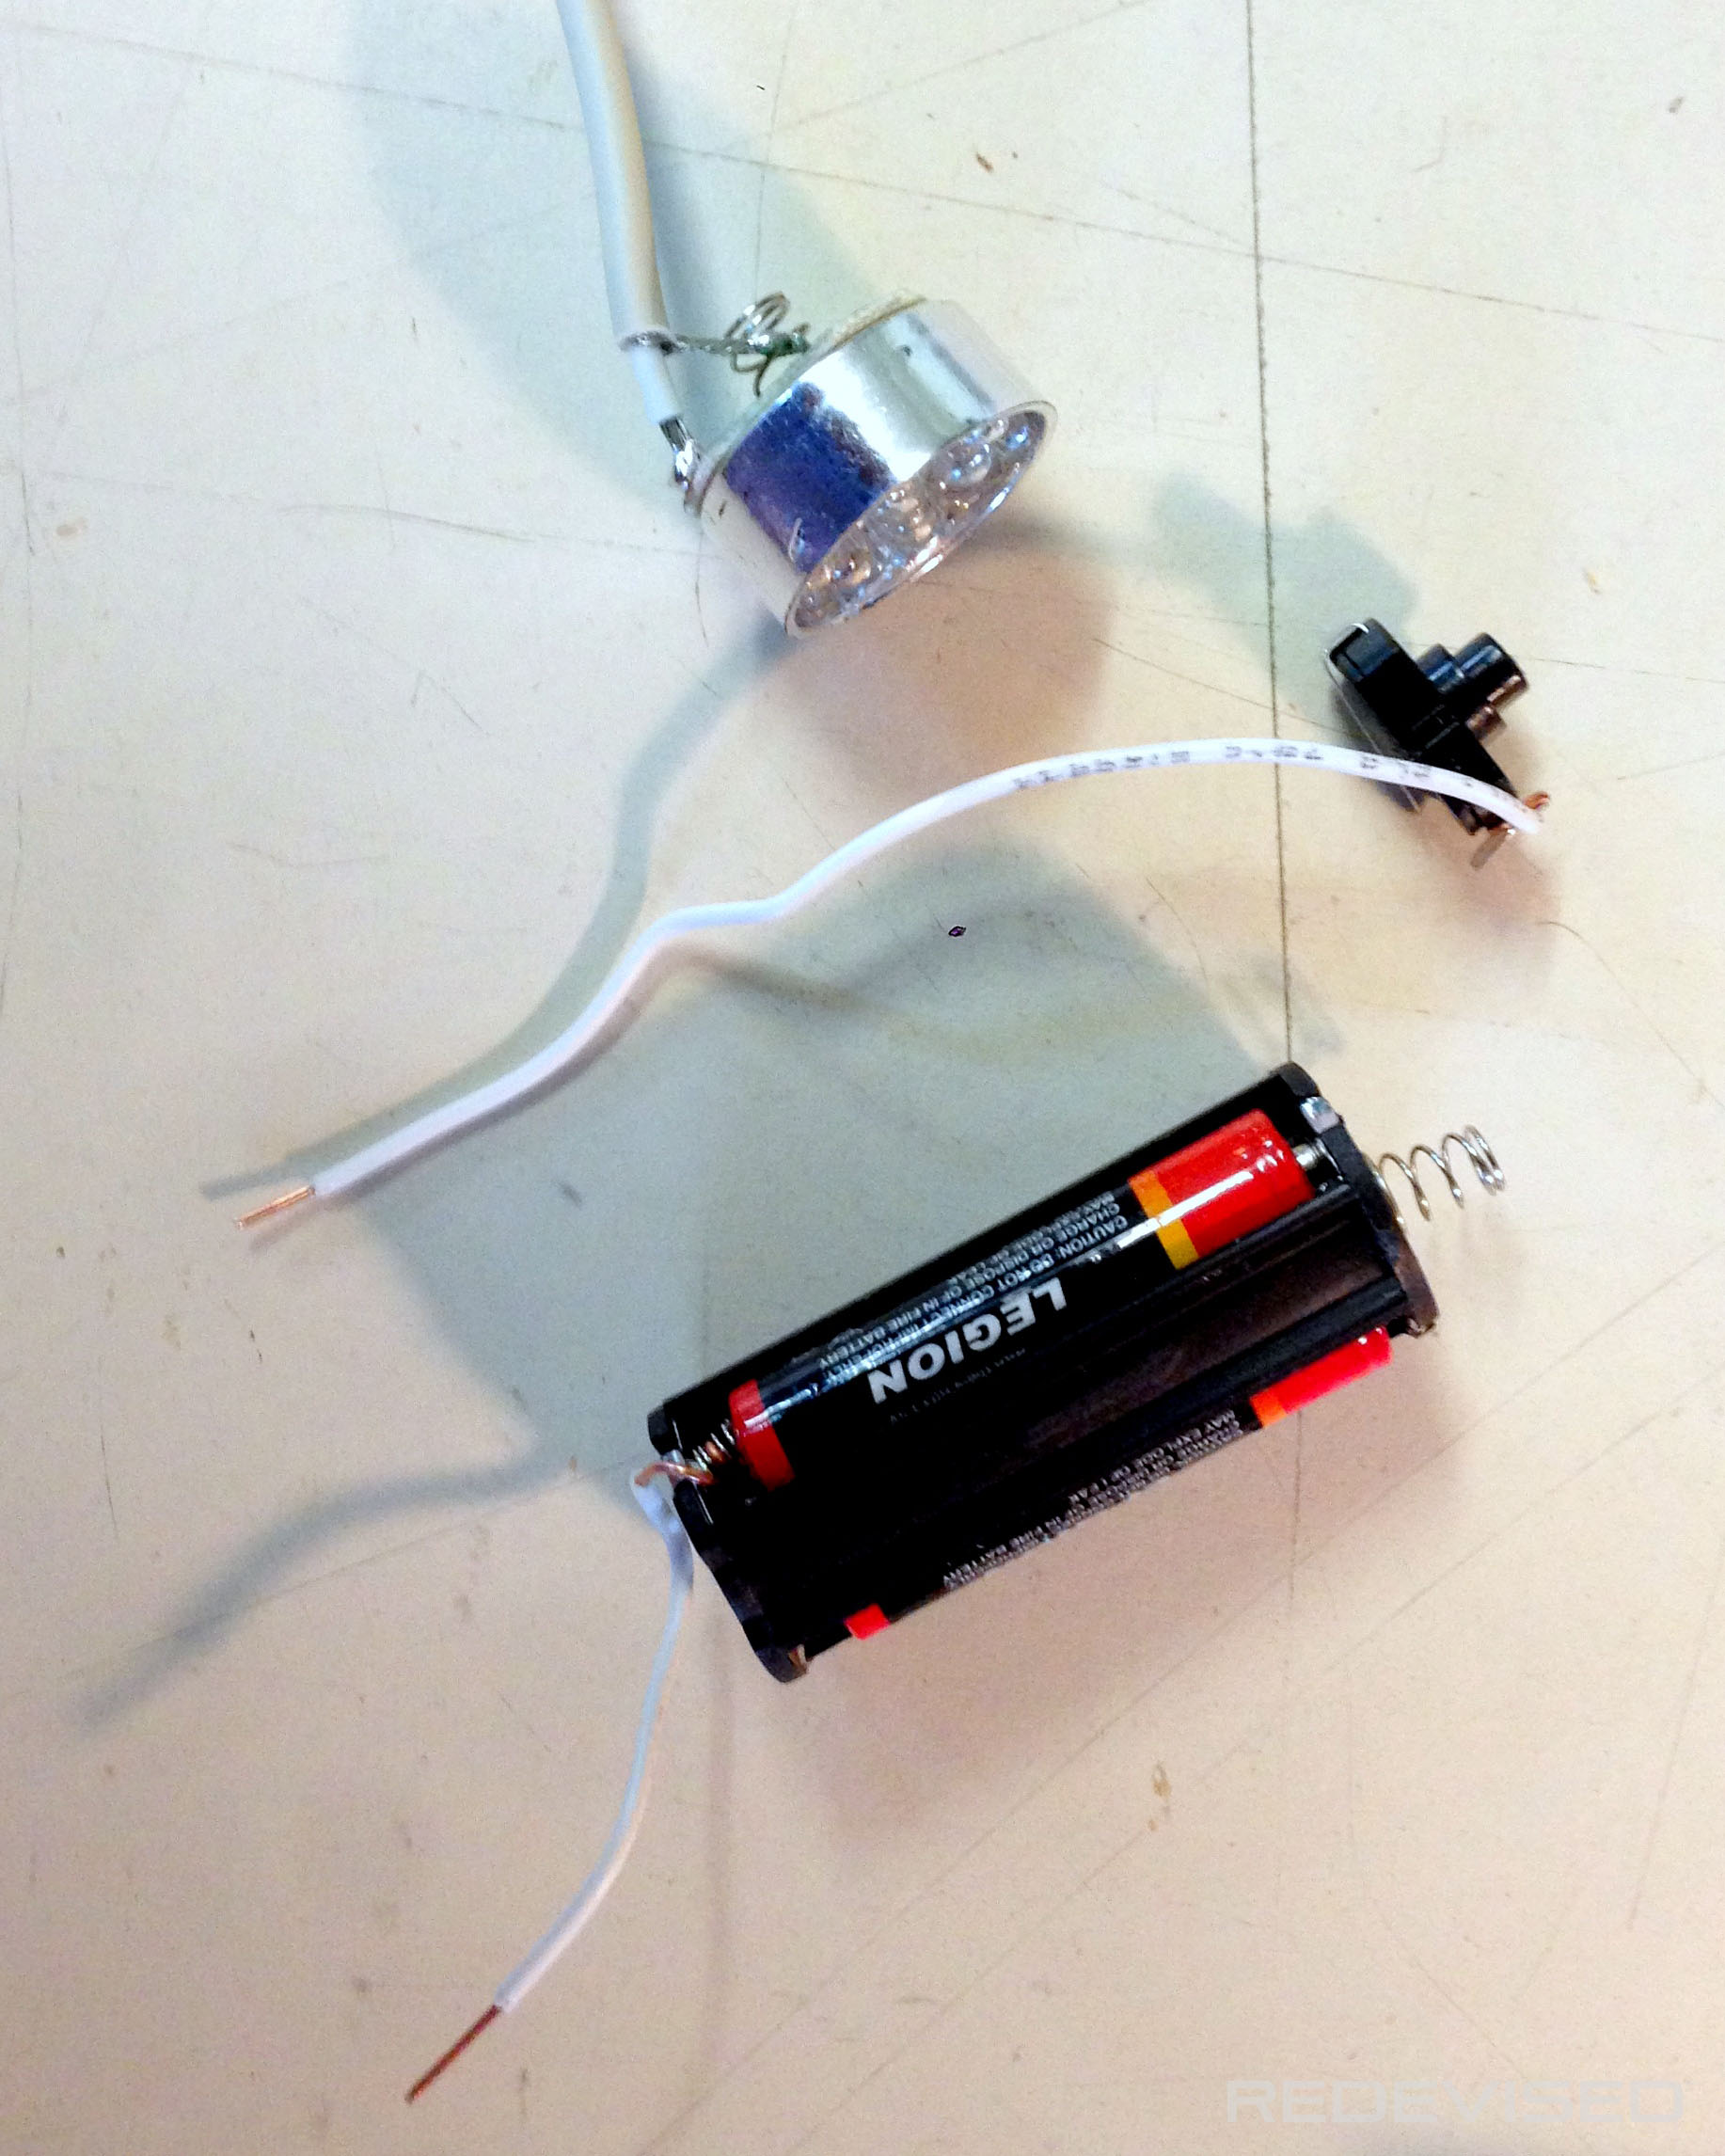
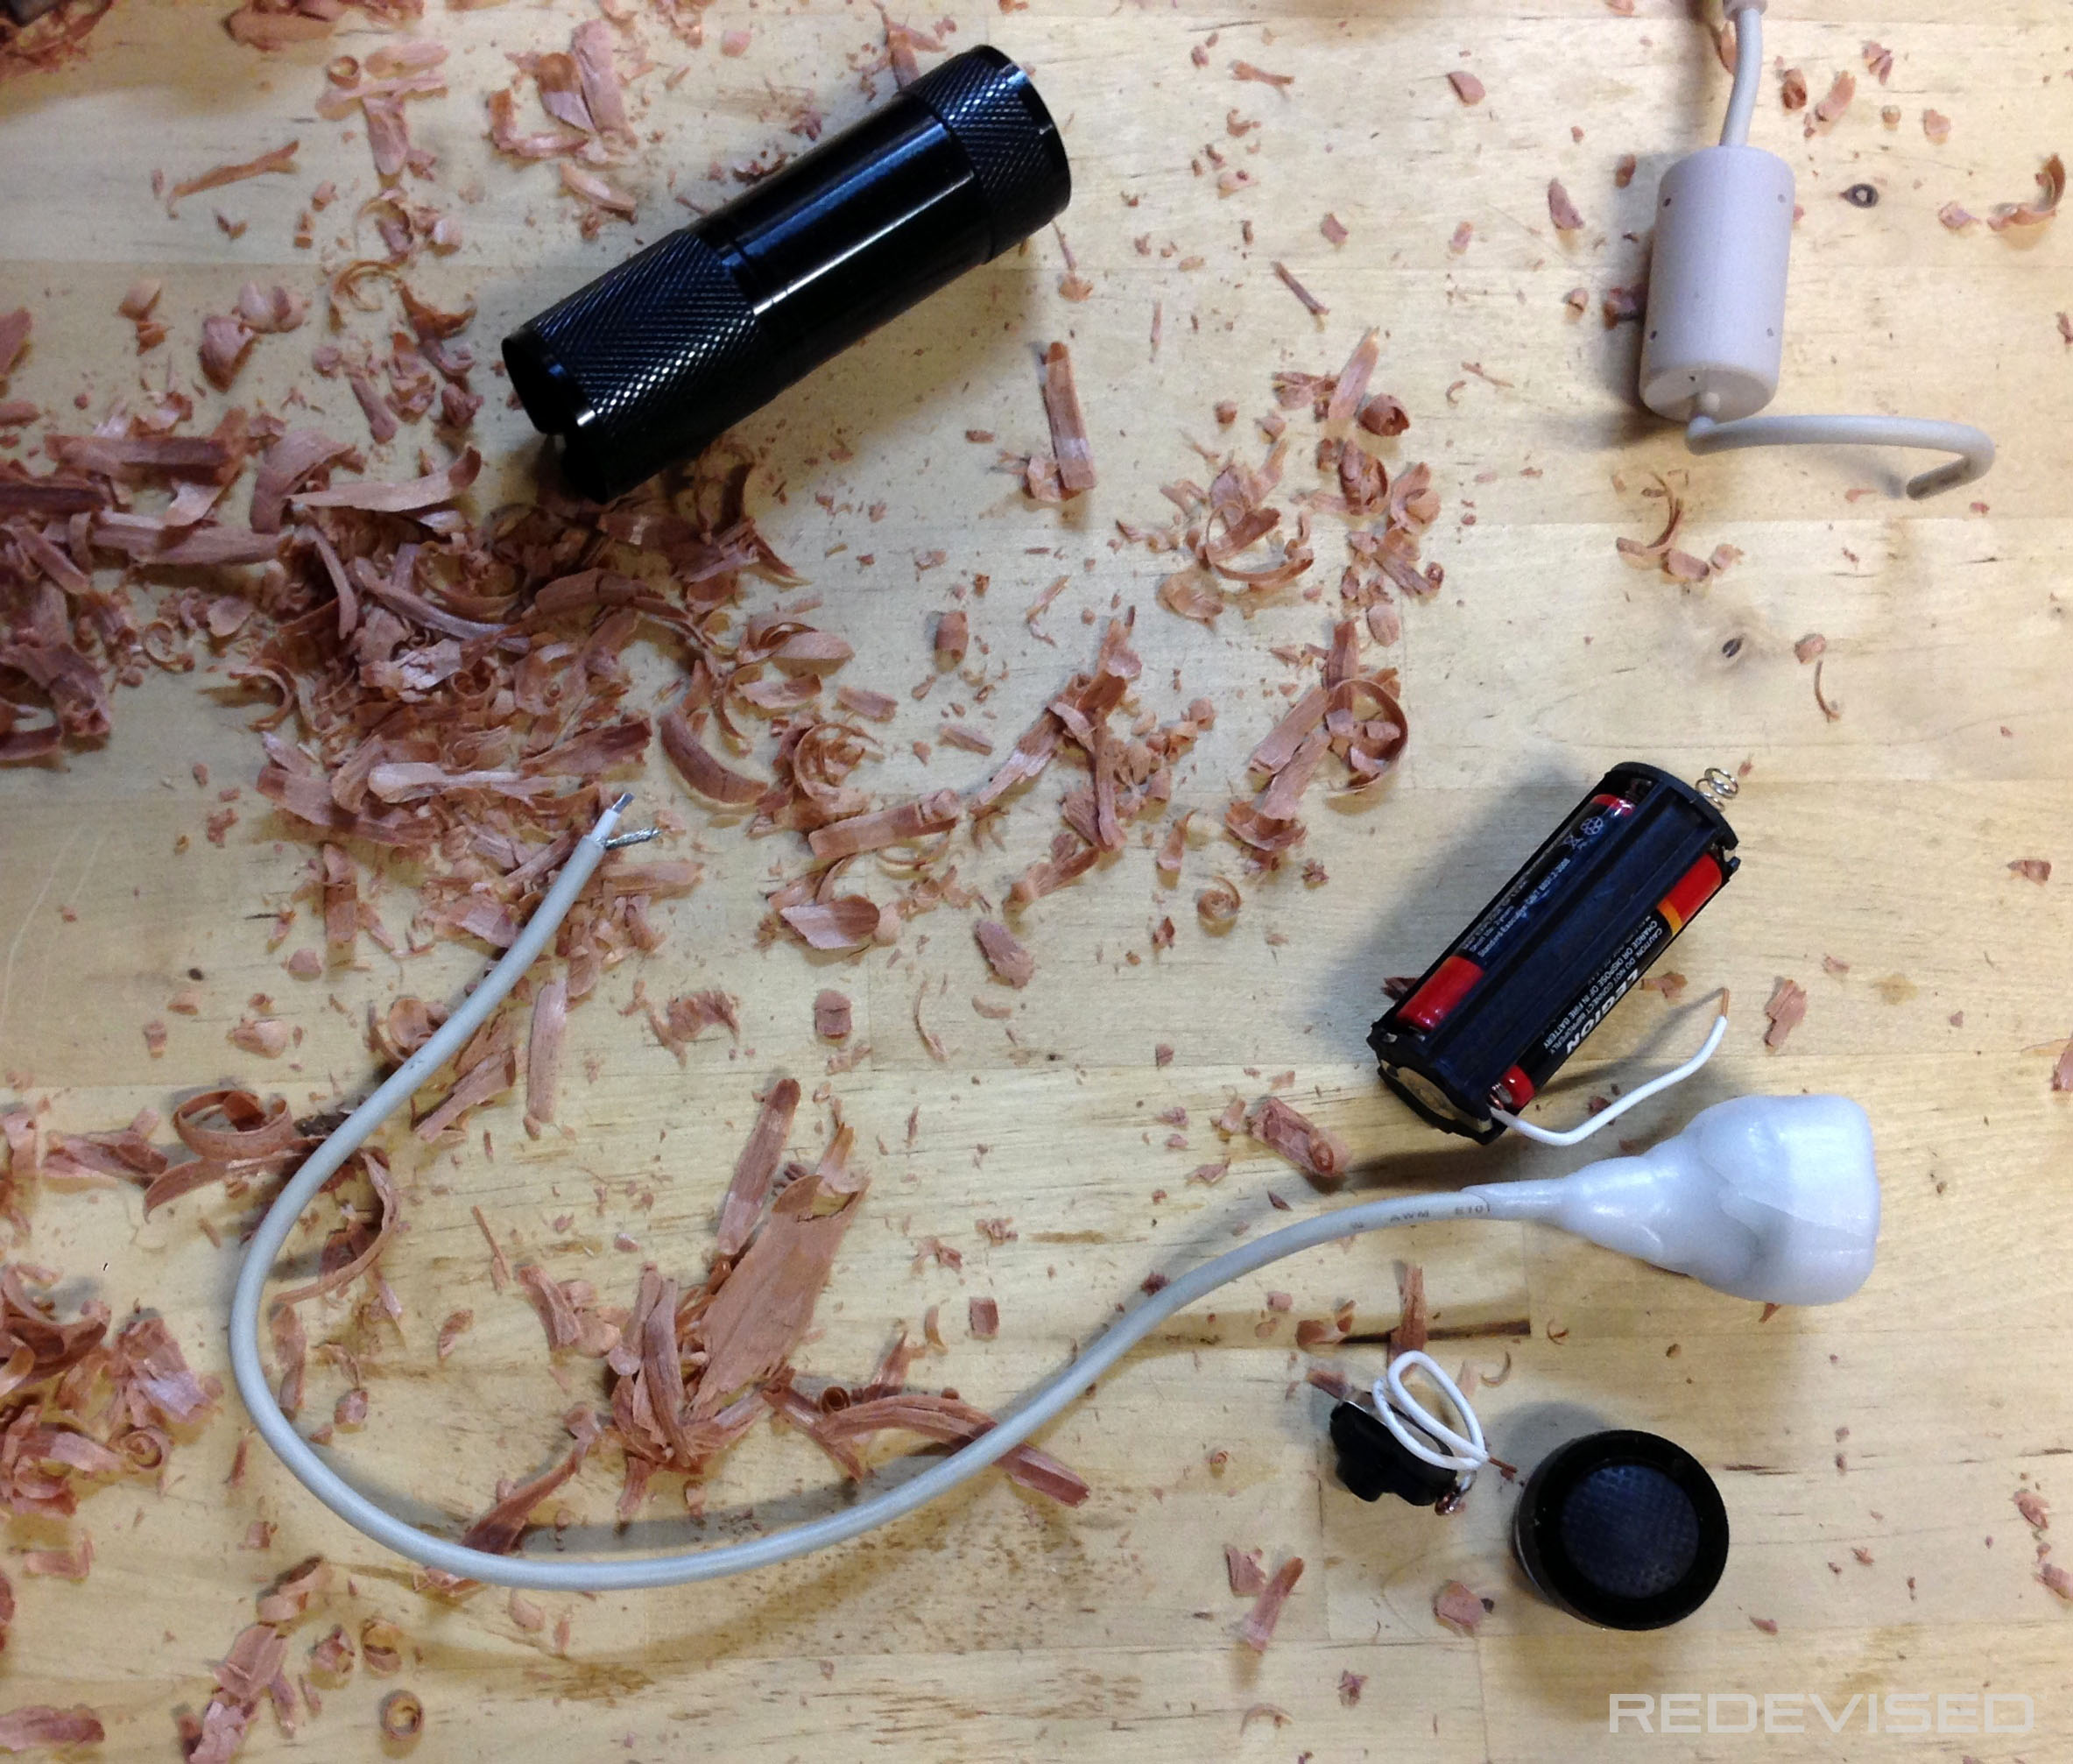
Although originally I liked the idea of an inverted periscope that would allow the kids to look underwater, I decided there was more wow-factor in having it be a switch to a functional head light. To do this I hacked a simple LED flashlight (the free ones you can get at Harbor Freight). A flashlight is simply a light source (LEDs), a power source (batteries), a switch (in this case a push button switch) and a casing.
What I did was place the LEDs on a wire and moved them away from the battery. I insulated the battery and switch with a balloon and the LEDs with plastic molding. I repurposed some spare wiring and soldered it to the appropriate contacts.
I used InstaMorph to encase the LEDs, which served the duel purpose of waterproofing it and diffusing the rather powerful light.


At this stage I had a much clearer picture of what the final design and assembly would be.
I used the auger bits again to clear out a hole in the sail for the batteries, and later I widened it slightly with a gouge.
Before going much further, I needed to cut out a hole for the sail planes. It would have been better to cut that out prior to shaping the sail on the bandsaw because cutting cleanly into a piece of wood with a curved base is tricky, even with a jig. I managed to do alright, first opening a hole with my drill and then cutting to shape with the scroll saw. The sail plane is held in place by the shaft of batteries.

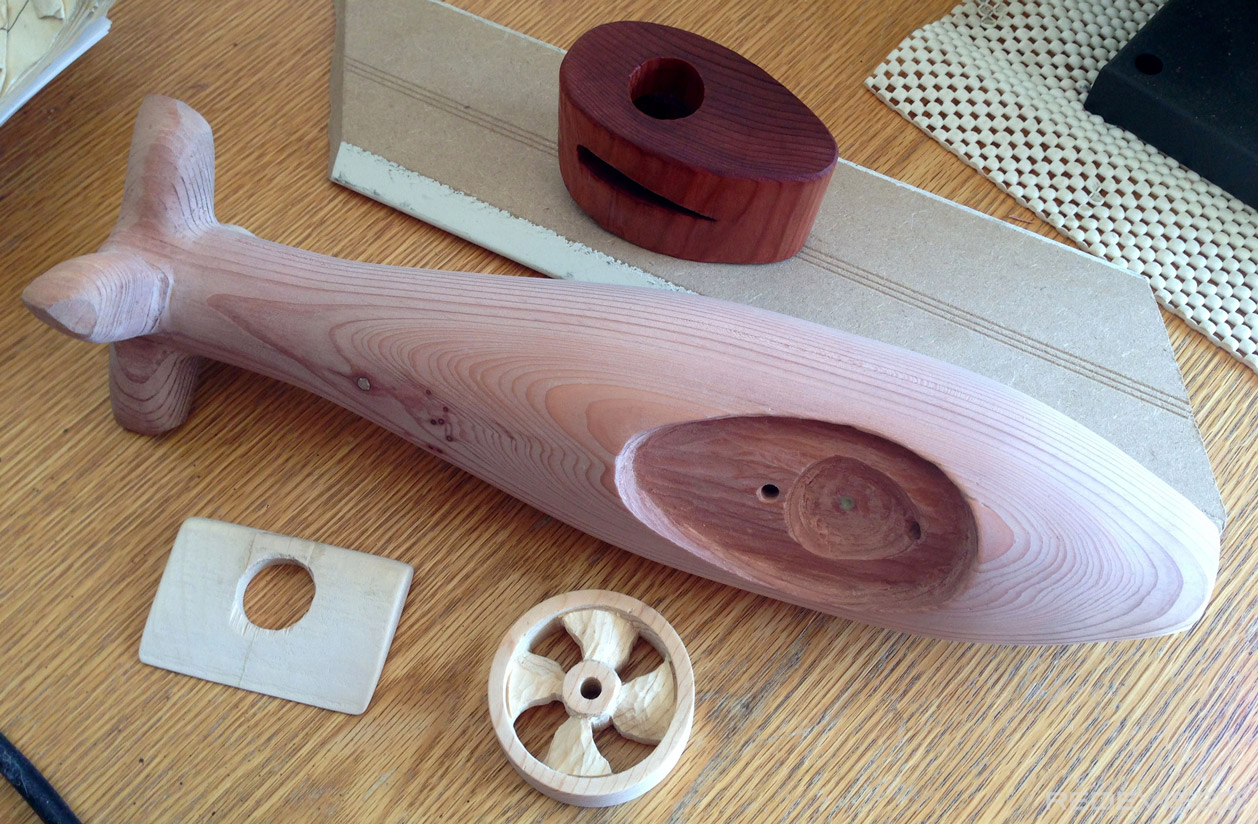
I carved a thin sail plane out of some spare basswood. The light-colored, figureless bassword would contrast well with the redwood.

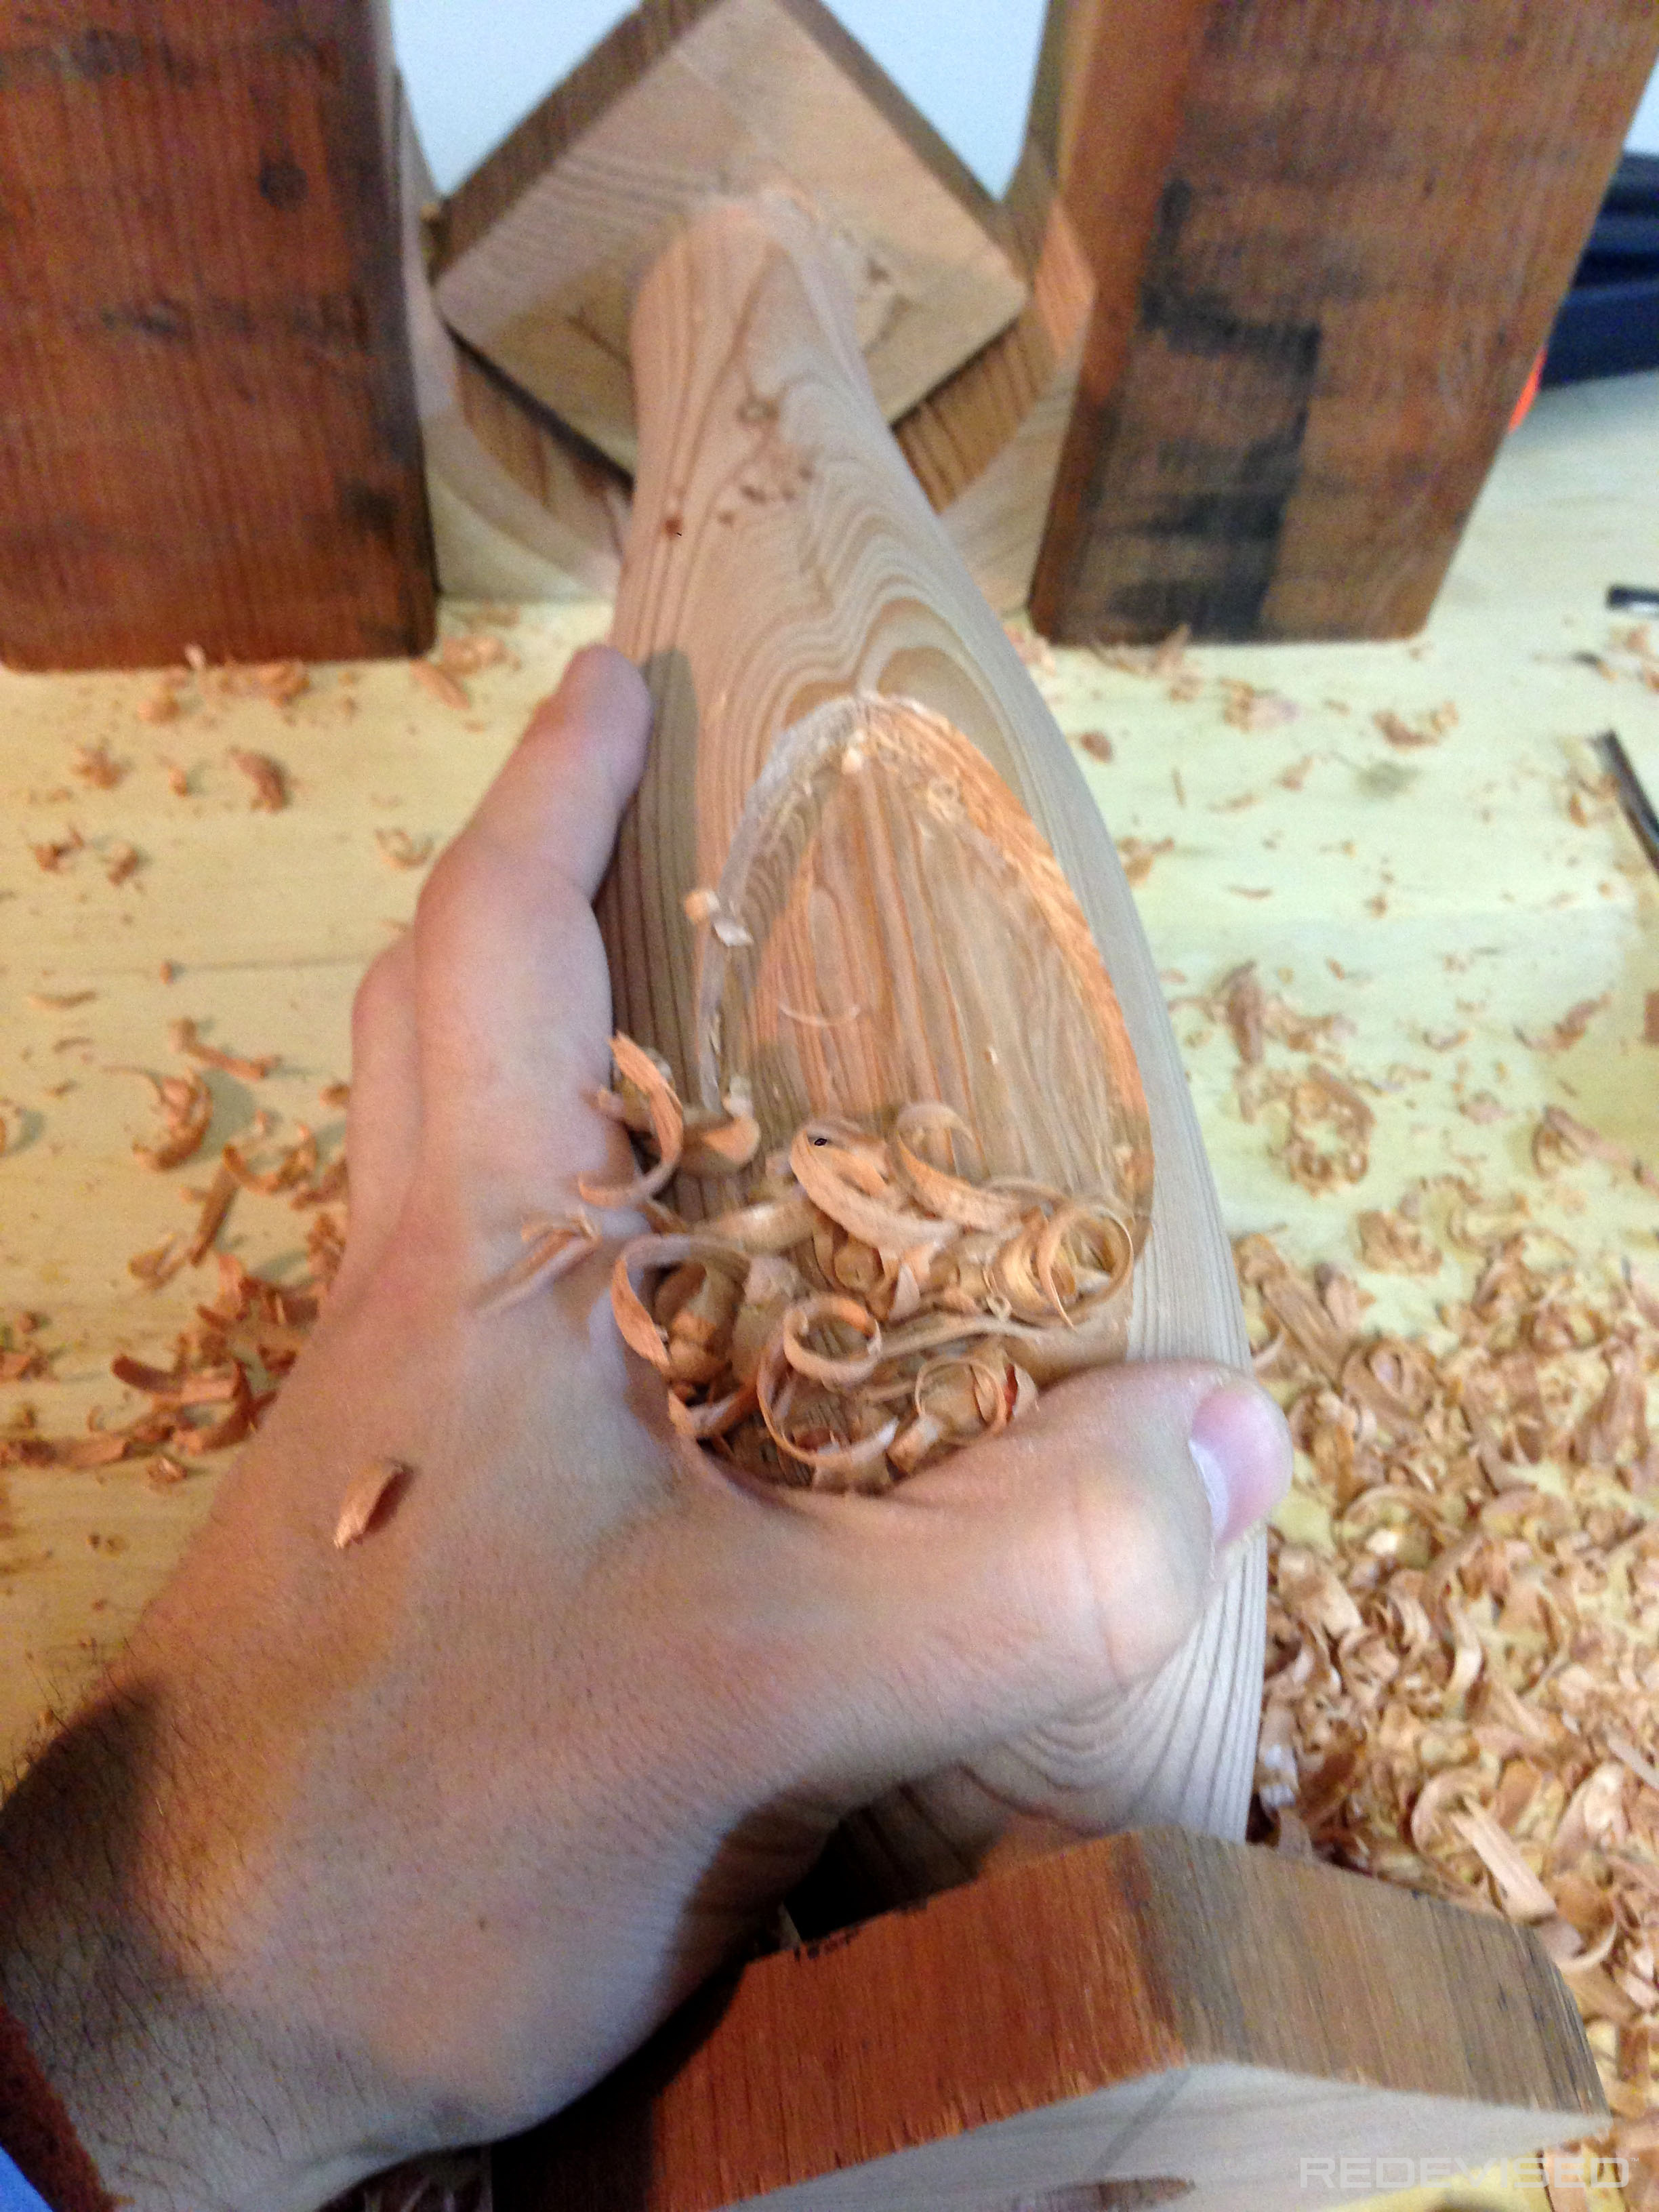
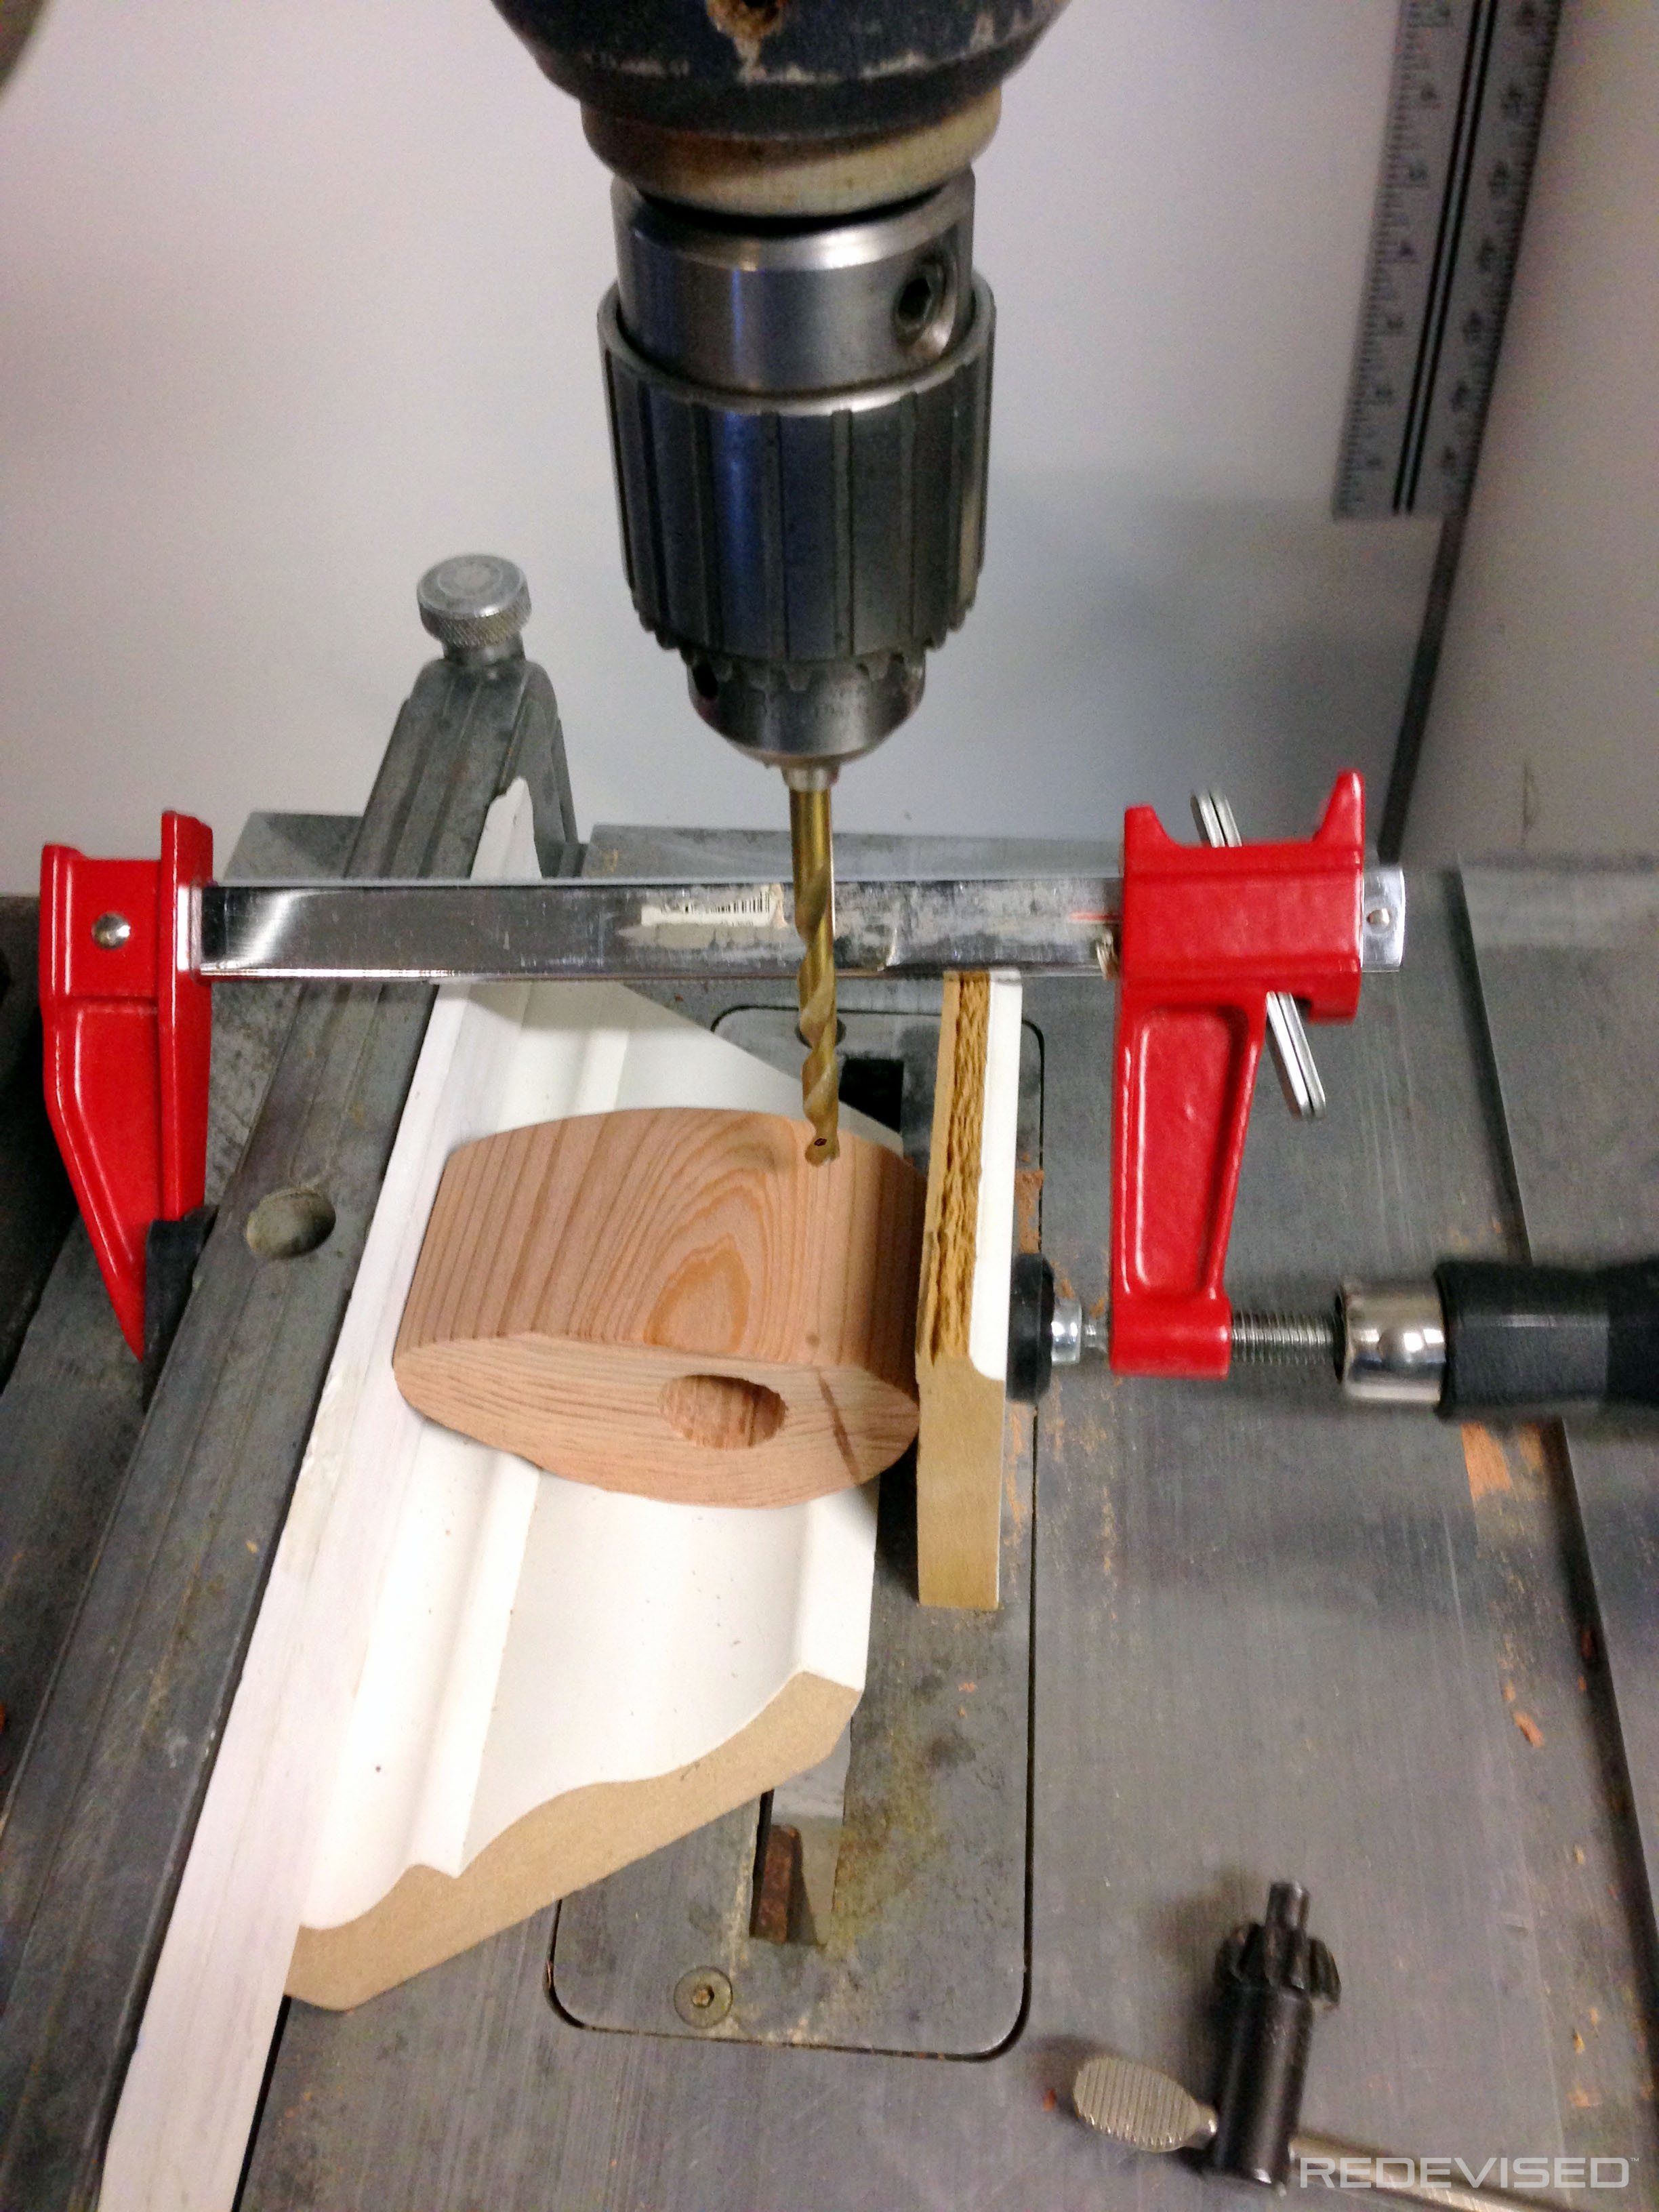
I then needed to clear out a space in the sail to fasten a nut onto the bolt that would be holding the sail onto the sub’s body. The small hole is for the bolt to go through. This step required some precision so as to give the attachment strength, to not interfere with the sail plane, and to provide me enough room to tighten the nut with tools. I carved this out by hand, though later I needed to remove even more wood to be able to fit in the balloon of electronics.
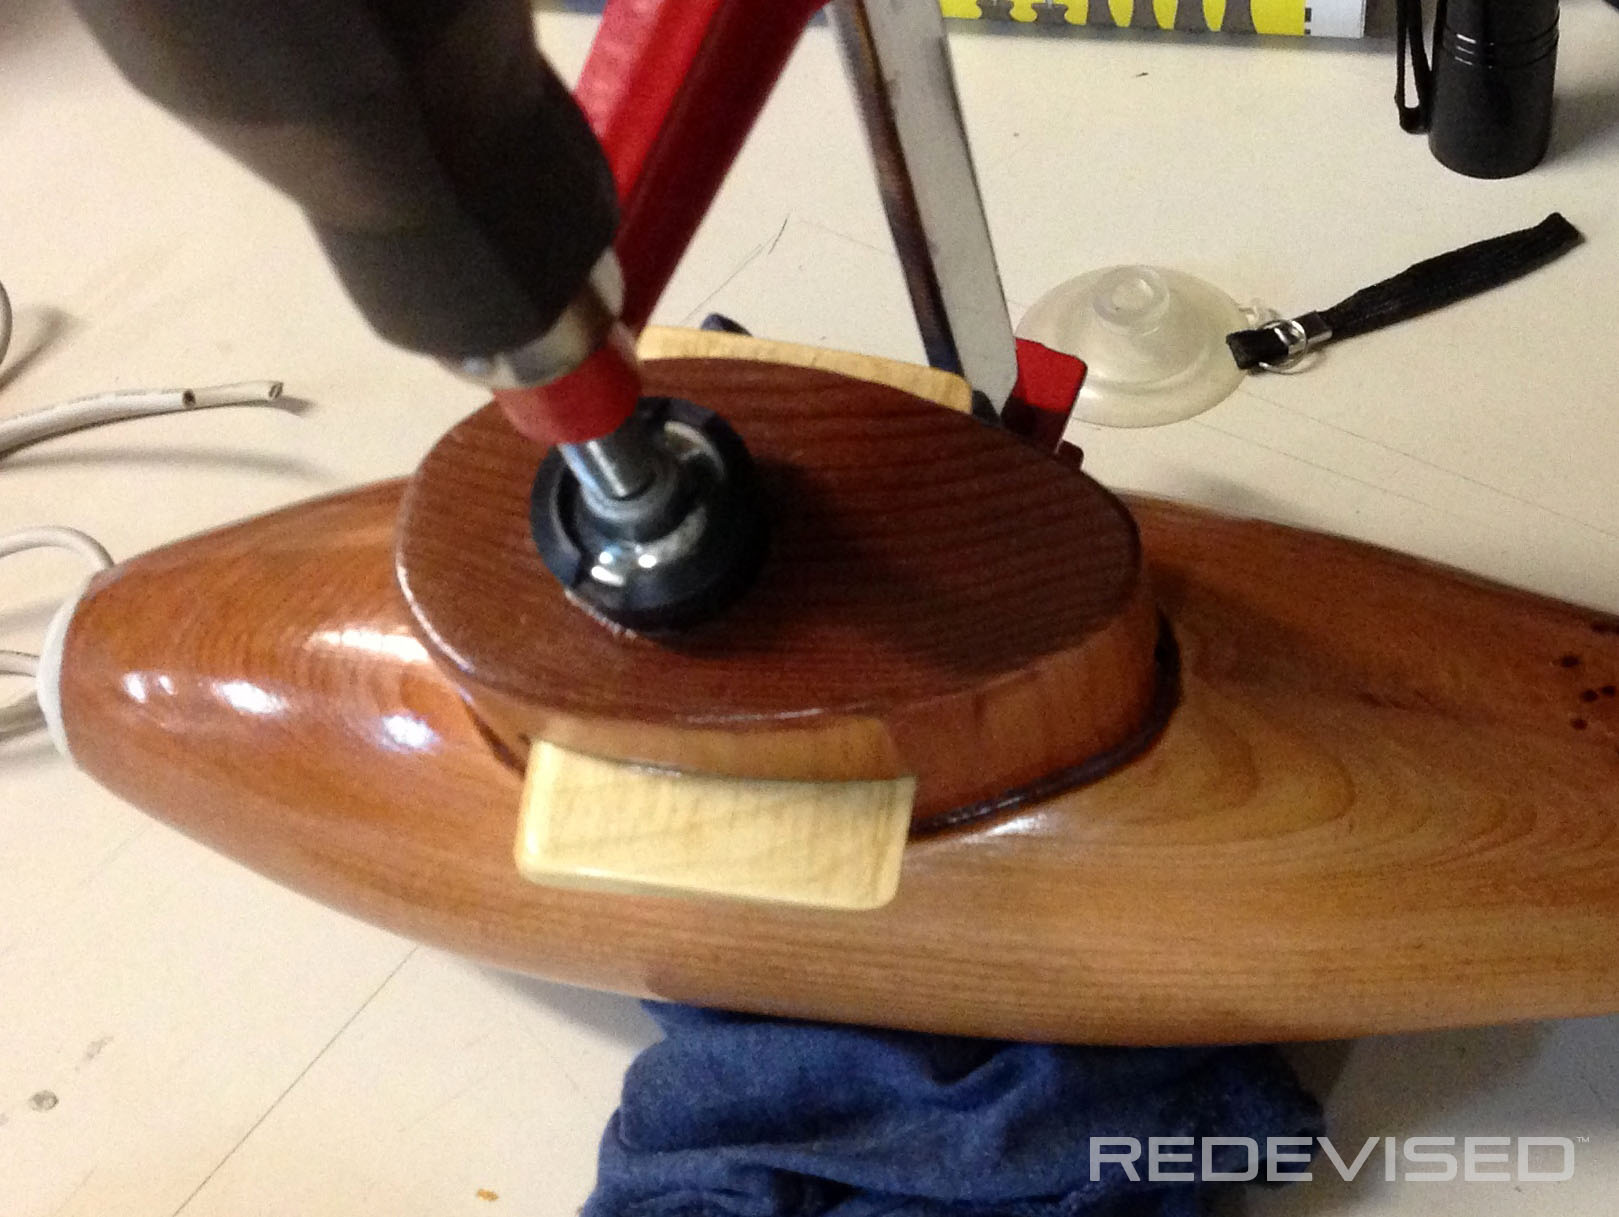
Two holes were then needed in the body of the sub: one for the bolt to hold the sail on, and the other for the wire from the batteries to reach the LEDs. (The cream colored dot is a glued up hole–a mistake I made before testing out the placement of the components.)


The Propeller
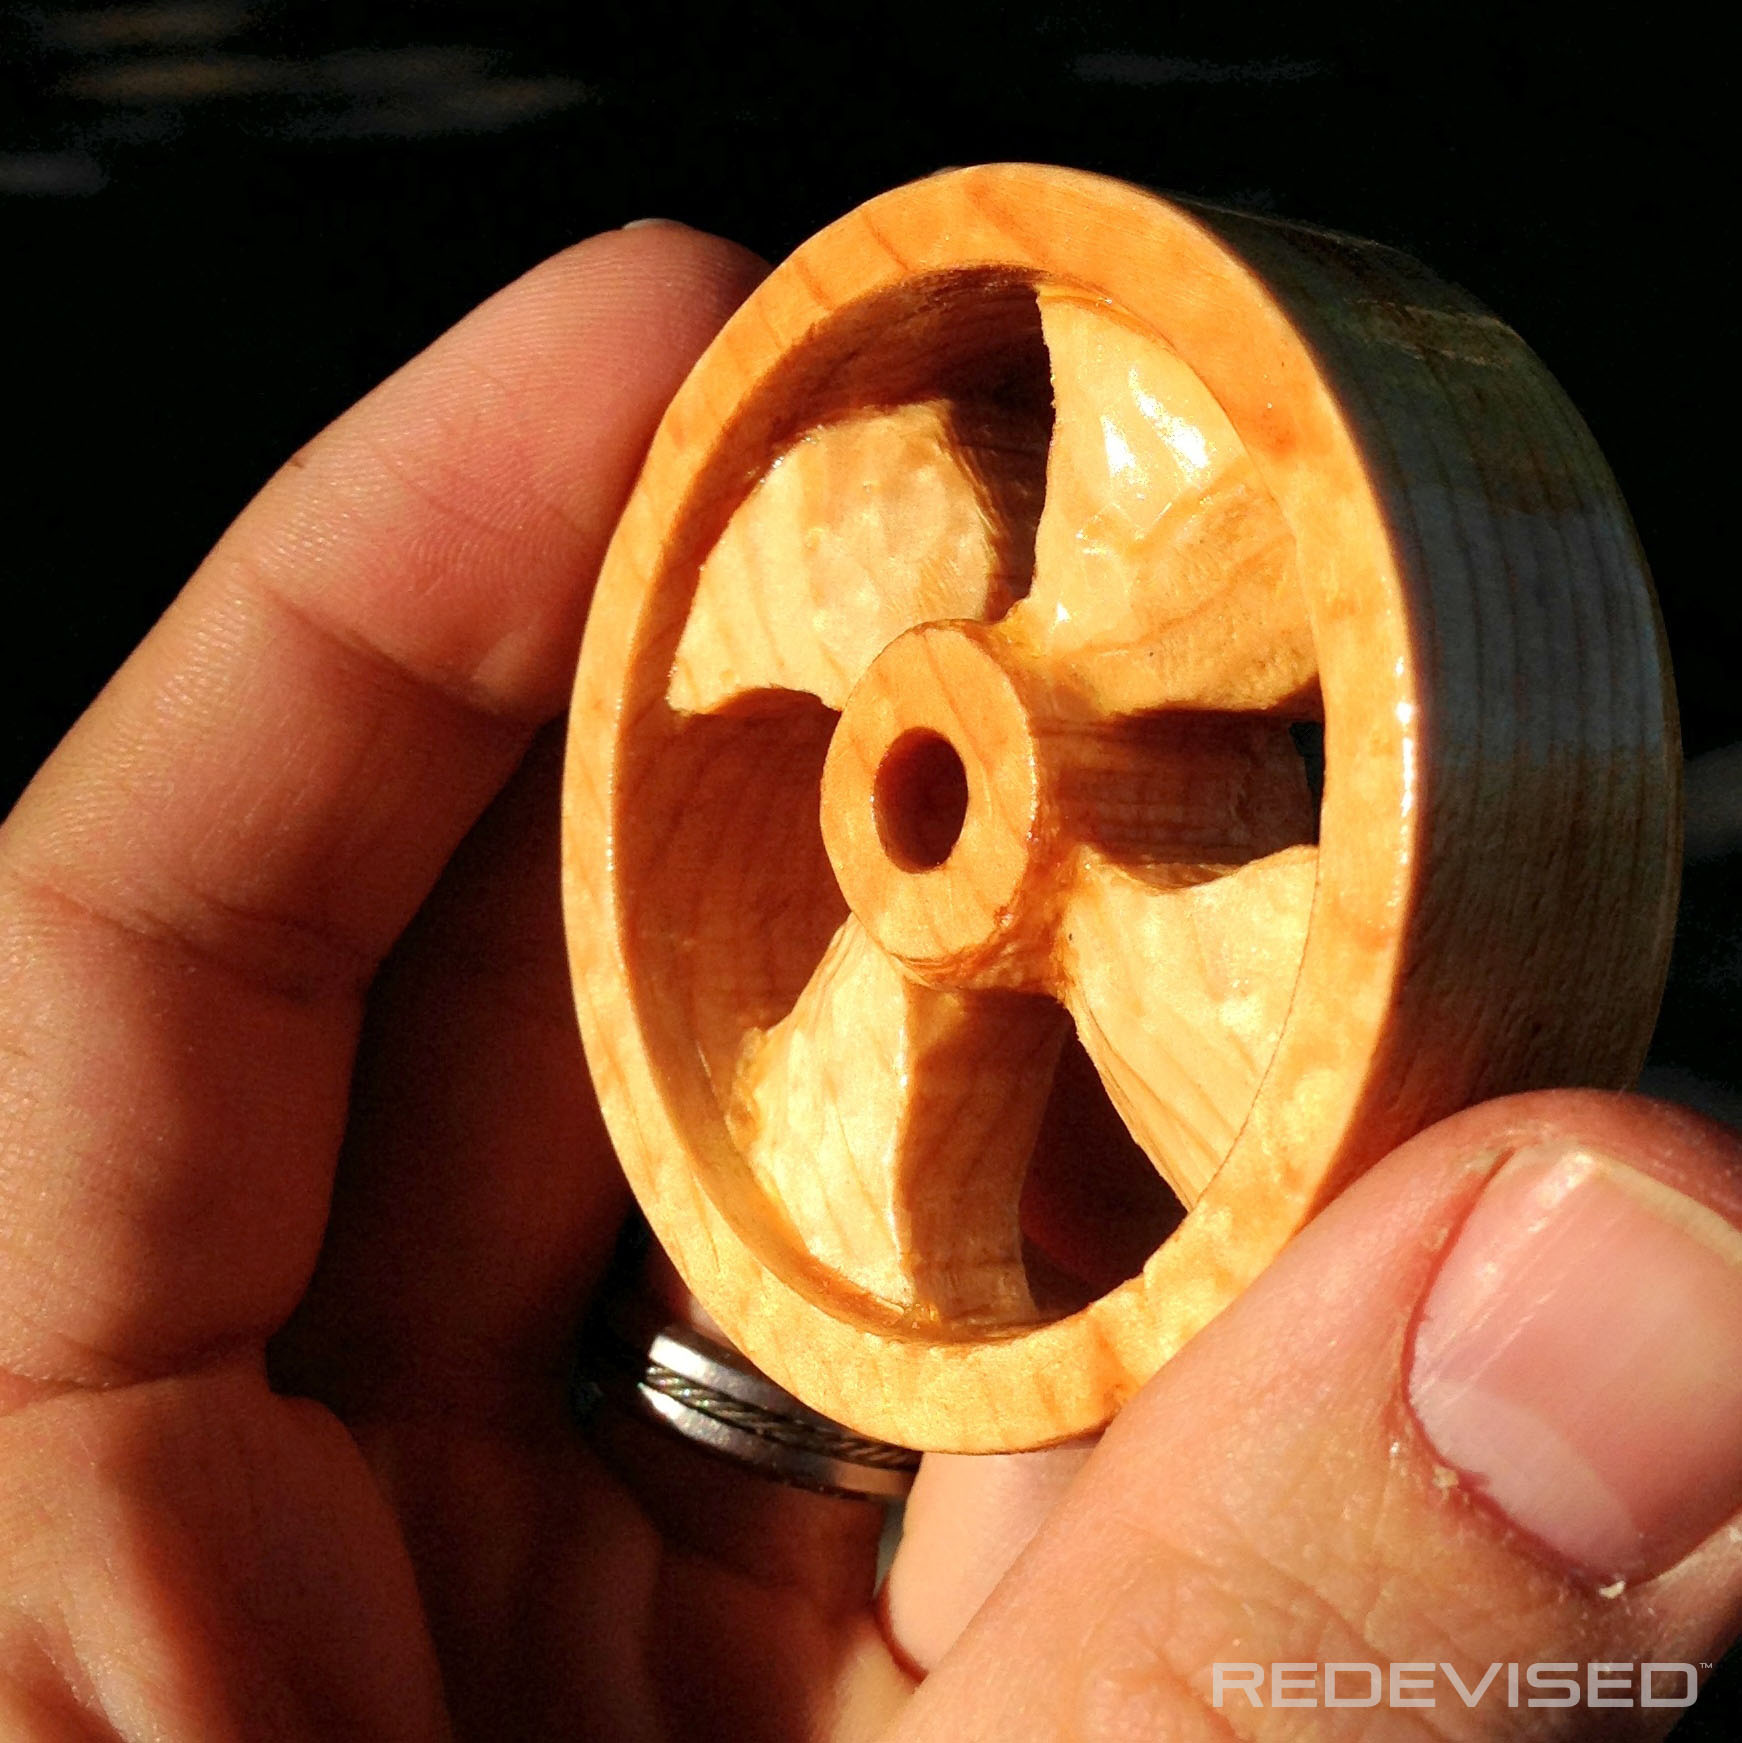
Probably my favorite part of the project was making the propeller. I used a surrounded circle design because I figured the blades of a small wooden propeller would not last long in the hands of a child unless they were protected from breaking off. I used some recycled pine for the part, which, when varnished, would have a similar color to the basswood, though with more figure. Using a hole cutter on my drill press worked well for creating a clean circle.
I used a smaller hole cutter blade to make a small indention on the inside of the circle. Then I cleared out the excess wood with a drill and then the scroll saw.
Then I hand carved the angles of the propeller blades.


The “Fins”
Before shaping the rudder and stern planes, one more hole needed to be drilled into the sub body. The tubing that is used to propel the sub enters from the underbelly in a 5/8th inch vinyl tube, connects to a 1/4 inch vinyl tube (compression fit secured with glue), travels the length of the tail-end of the sub and then exits out the back. I cut out a small trench inside the sub so the tube would not be crushed by the metal rod.
I then carved out the rudder and stern planes. I made them wide because I was concerned about them breaking off (particularly the rudders because of the grain).
Then I sanded them to achieve a smooth finish.


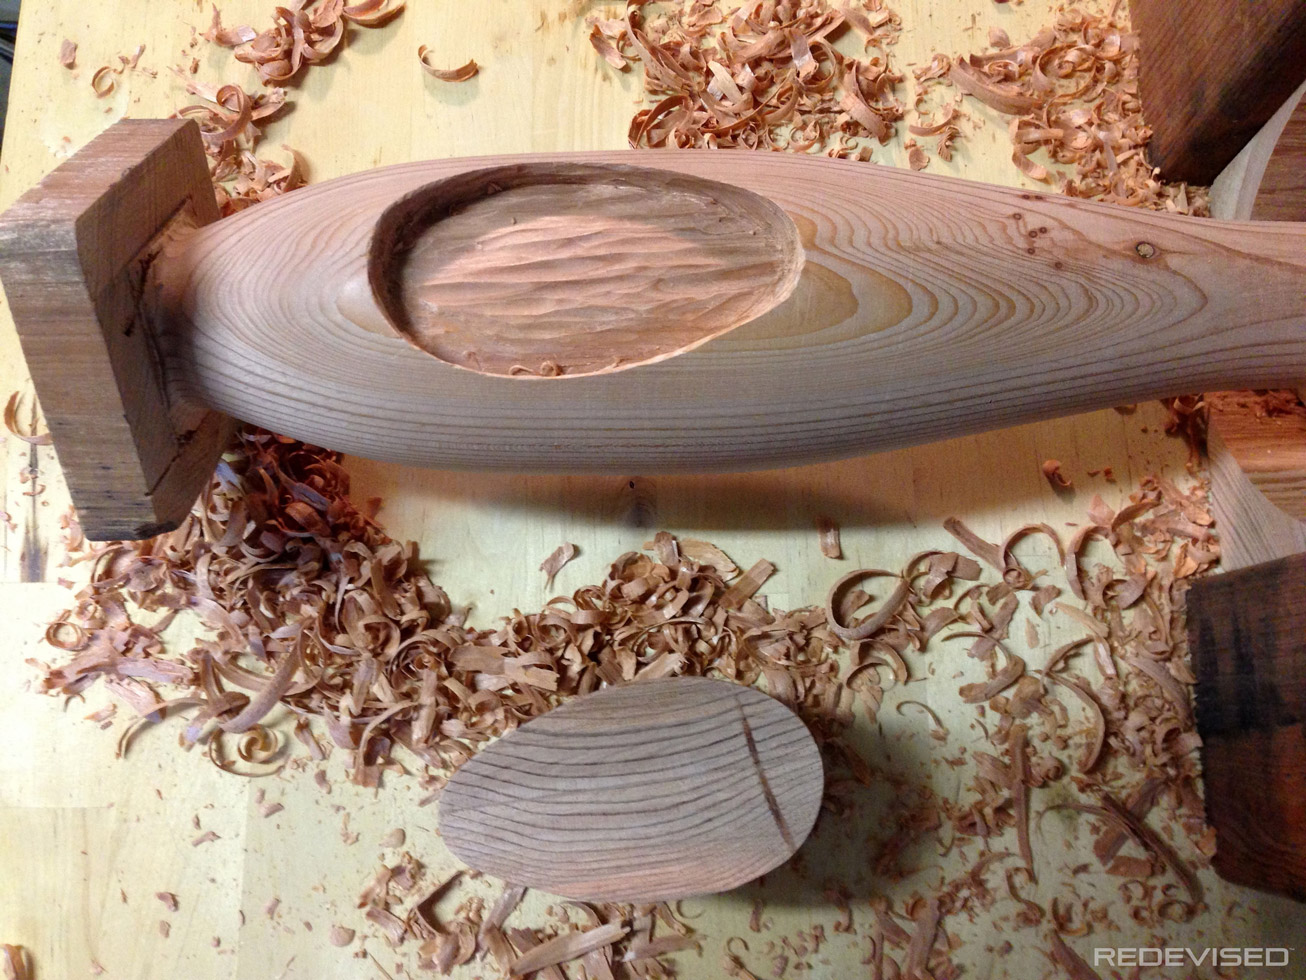
Inside the Submarine
To hold true to the design constraint of hiding artifacts, I embedded all the weights inside the sub. The main weight was a metal rod that ran the length of the sub. However, in testing I found that was not heavy enough. I needed to clear out more space inside to add the copper ball bearings. This was done in a rather crude fashion with some auger bits on a hand drill and some old lathe gouges, and as the result was not squarely centered, it did result in a slight tilt to the sub when floating. In this photo you can also see the trench for the tubing that leads out the back of the sub.
Assembly & Finishing
Before finishing the wooden parts, I did quite a bit of testing: testing to make sure the sub would float correctly, testing to make sure all the parts would fit, and testing to make sure I know the proper assembly steps.

At this stage I needed to finish the assembly of the electrical unit. With proper placement of the LEDs, I trimmed the wires to length (enough that the unit could be removed to change the batteries), put the push button switch and battery together and attached the wires (non-soldered so unit could be disassembled easily). All of that went inside the balloon, which was tied off.

Then it was time to finish the wood. I used four coats of a gloss polyurethane, which essentially means I painted on a plastic coating. A thick coating was important to me because it would protect the wood but also give it a maritime feel, in my opinion. If I had more time, I would have done more. You can easily see the difference in color between the finished and unfinished redwood.
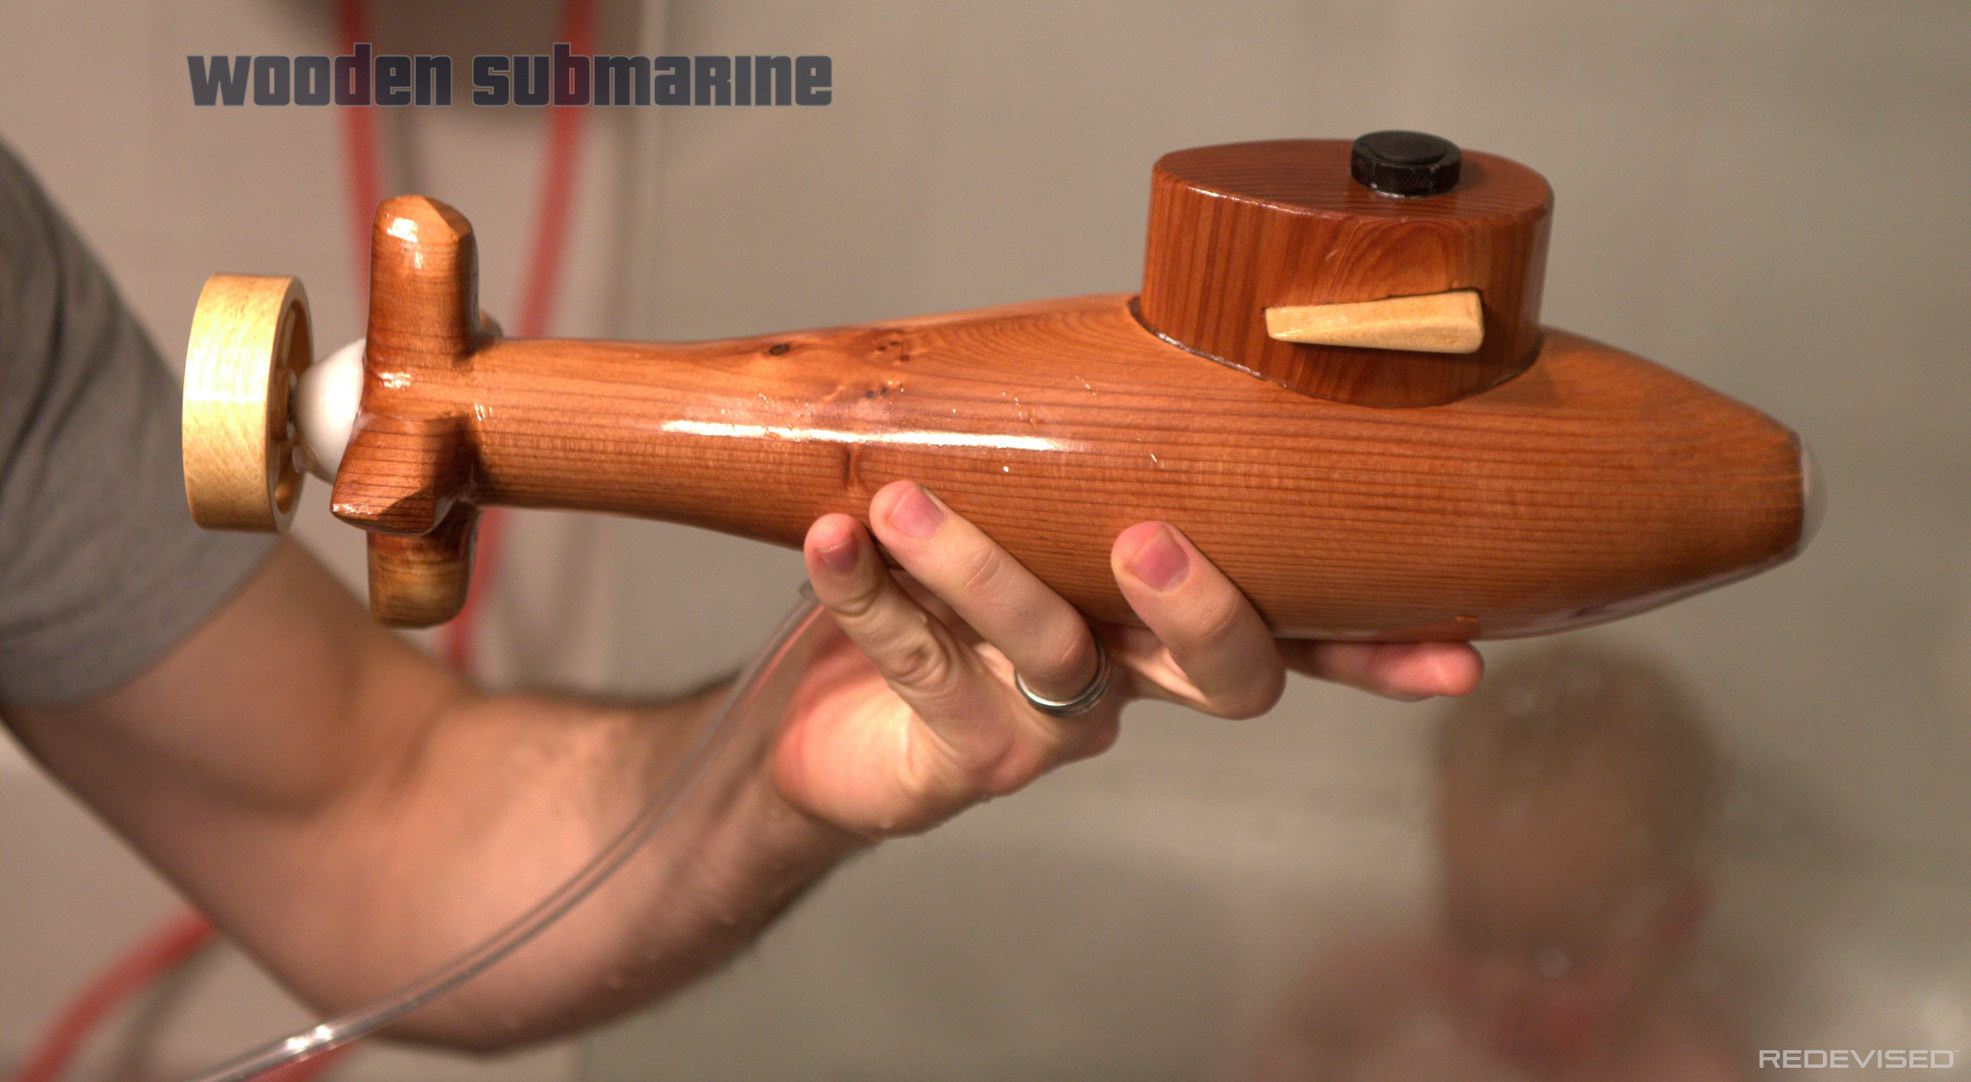
The finished pieces looked like this:


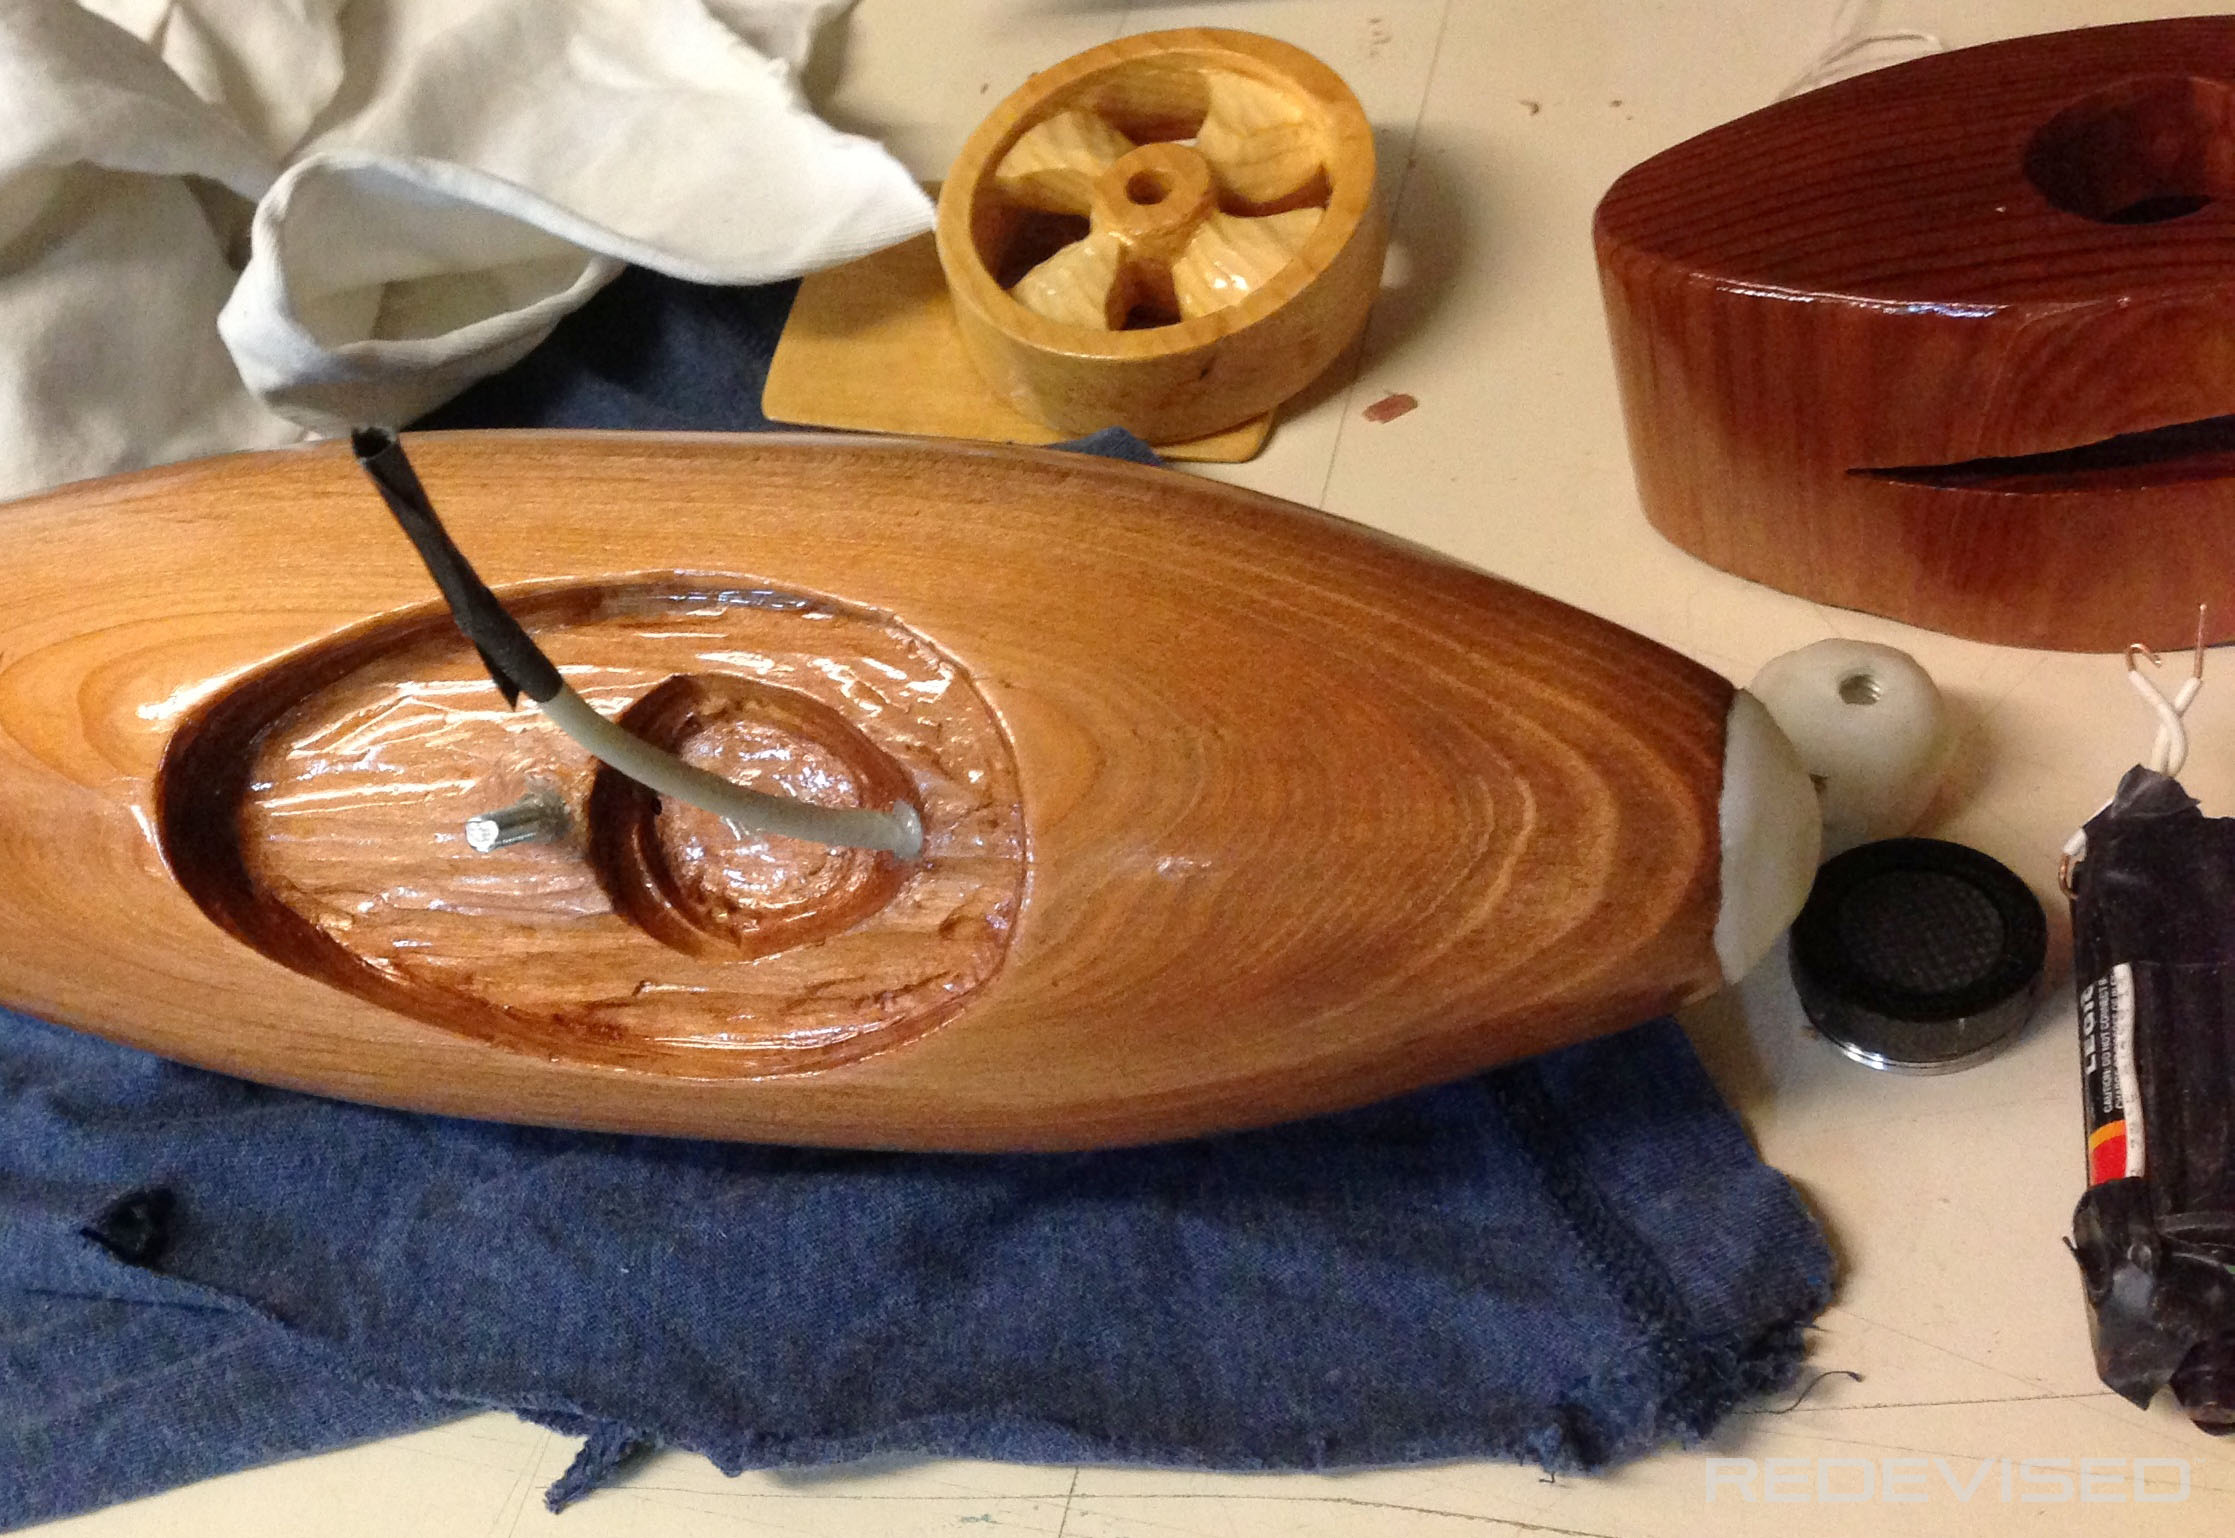
To help with adjustment of the metal rod, I used a hack saw to cut a slit so I could use a screw driver to turn the rod. (The bump in the middle is actually the tip of one of my screw drivers that broke off.) This really paid off when doing additional testing and fine-tuning the adjustment.
The endcap of the sub was also a custom-molded piece, and embedded in it were two nuts: one for threading onto the tube and one for threading on the bolt that holds on the propeller.

Here you can see all the parts before final assembly (except for the metal rod). Note the end-cap with embedded nuts, the copper ball bearings, and the combined tubing. The string was a highly useful tool for getting the sail bolt in place.

The order of assembly was important and went something like this:
- Insert tubing component and cut 3/8 inch tube closer to the sub body
- Insert sail bolt with rubber o-ring through sub cavity and out the sail bolt hole
- Apply clear bathroom caulking to these holes and let dry
- Insert headlight component and pull wiring through its hole in the top of the sub
- Insert metal rod to proper position
- Pull out headlight slightly and pour in proper amount of copper ball bearings
- Reinsert headlight component and apply clear bathroom caulking to the wiring hole and the headlight/body seam; let dry
- Install sail and tighten a nut onto the sail bolt
- Slide in the sail plane so the periscope holes are aligned
- Assemble battery component by attaching wires with electrical tape and securing inside the balloon
- Insert balloon into sail (very tricky, should have made more space)
- Insert periscope button and clamp down
- Apply clear bathroom caulking to periscope hole, sail/body and sail/sail plane seams; let dry
- Thread rear tubing into end-cap mold nut
- Apply additional molding to adhere end-cap to metal rod and hole
- Apply clear bathroom caulking to body/end-cap seam and let dry
- Put bolt through propeller hole and attach to end-cap nut, loose enough that propeller can spin freely
- The caulking needs to set for a week
The Delivery
When I presented it to the kids, they were not entirely sure what to do with it. That is, until they figured out the periscope button–then it instantly became desirable.

Of all the testing I did, you’ll notice I left out the most important kind–user testing. That was obviously because it was a surprise, though I did break down and show it to them early to do some quick qualitative “fun assessment.” They love to talk about the submarine and have gotten a lot of fun out it, but so far they have no patience to watch it propel through the water. I don’t even attach the intake tube at bathtime anymore. Aside from the light, they really like driving it through the water and spinning the propeller.

The light gives off a lot of light–especially with the room lights dimmed.

It has made for a fun Christmas 2013 and many a fun bathtime thereafter.
If you like this project, please take a
second to share it with the world!